How to cast in-situ terrazzo flooring
In this post, you are going to learn how to cast insitu-terrazzo flooring from start to finish
GENERAL CONSTRUCTION
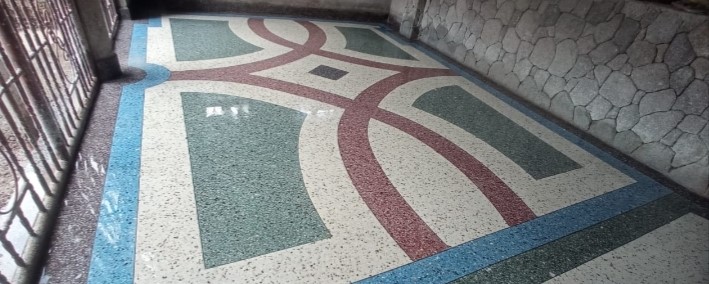

Table of Contents
Core Concept or Idea
What is Terrazzo Flooring?
Importance of Using a Terrazzo Floor
Estimating Terrazzo Flooring Materials
Process of Casting Terrazzo
Materials and Tools Required
Mixing Terrazzo Aggregates and Cement
Installing Divider Strips
Installing Temporary Bidding Sticks
Casting Terrazzo
Grinding Process
Final Touches
Conclusion
FAQs
Terrazzo flooring is a popular choice for both residential and commercial spaces due to its durability and also because it is good-looking to the eye. This guide will take you through the entire process of creating terrazzo flooring, from material estimation to the final grinding stages.
As a civil engineer with years of experience in building and construction, I’ve discovered a method that is simpler, experience-based, tested, and trusted, and you can rely on it when casting terrazzo for your floor.
Whether you are a do-it-yourself beginner or experienced in terrazzo flooring, this post is perfect for you. The method used here is simple and can clearly be understood by everyone.
What is Terrazzo Flooring?
Terrazzo is a composite material made from chips of marble, quartz, granite, or other suitable materials, poured with a binder such as cement. After a few days, the floor is ground. The result is a smooth, durable surface that can be polished to a high shine. Before diving into the process, it's crucial to understand the benefits and components of terrazzo flooring.
Benefits or advantages of using terrazzo flooring
Durability: Terrazzo is resistant to wear and tear, making it suitable for high-traffic areas, for example, in churches, mosques, schools, and shopping arcades.
Strength. A terrazzo floor is very strong and ideal for factories and gyms since heavy machines and other items are always hit on the floor.
Aesthetic Versatility: With a variety of colours and designs, terrazzo can match any interior style and can be custom made to fit the client's requirements.
Low Maintenance: Once cast, ground, and polished, terrazzo floors are easy to clean and maintain.
How to make a terrazo floor or How to cast terrazo
Step 1: Estimating Terrazzo Flooring Materials
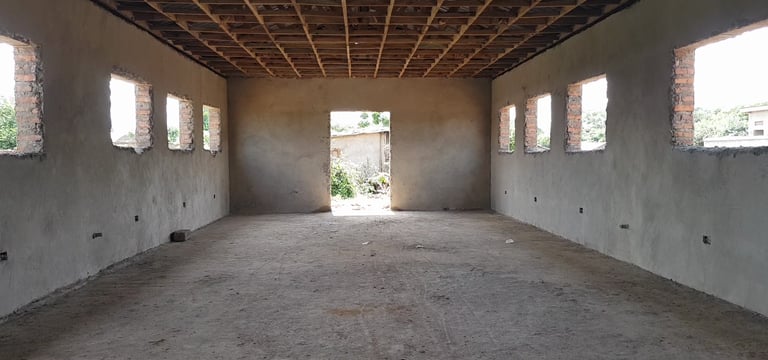
The first step in the terrazzo flooring process is to estimate the materials needed. This involves calculating the area of the floor.
Example 1
If the floor measures 10 metres in length and 6 metres in width, the area is calculated as follows:

Area = Length × Width
= 10m × 6m = 60m²
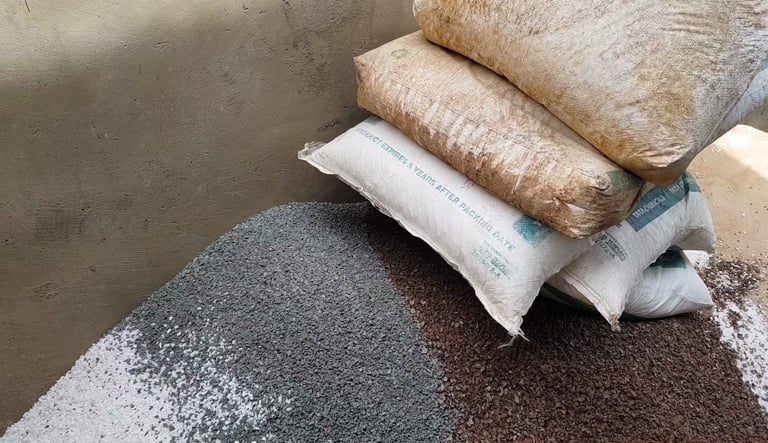
Next, determine how many bags of aggregates and cement are required:
Bags of aggregates = floor area ÷ 2
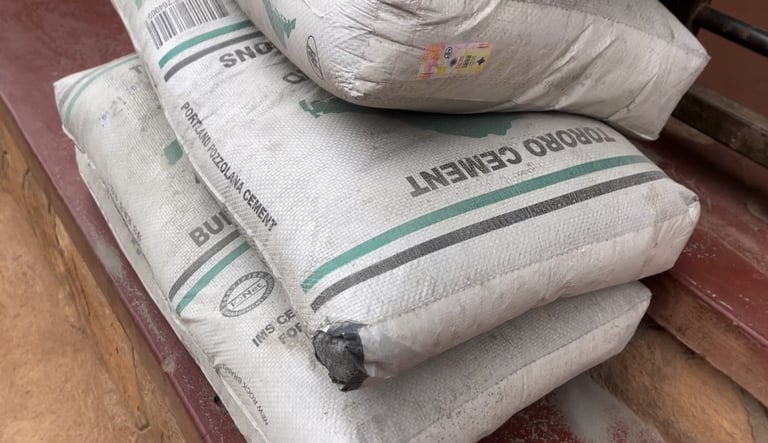
Bags of cement = floor area ÷ 4
For a 60 m² floor, you would need:
30 bags of aggregates
15 bags of cement


Example 2
Considering a room of 5m along the length and 4m along the width
Area = length x width
= 5m x 4m = 20m²
Bags of aggregates = floor area ÷ 2
Bags of cement = floor area ÷ 4
For a 20 m² floor, you would need:
10 bags aggregates
5 bags of cement
Therefore, in simple terms, when your room is 5 m along the length and 4 m along the width, you simply purchase 10 bags of aggregates and 5 bags of cement to cast terrazzo for your floor. As simple as that.
Be sure to also include the area for the skirting to avoid underestimating your work.
We are considering a bag of cement to be 50 kg and the weight of aggregates to be 40 kg for each bag.
Tools needed to cast in situ terrazzo floors
To successfully cast in situ terrazzo flooring, the following tools
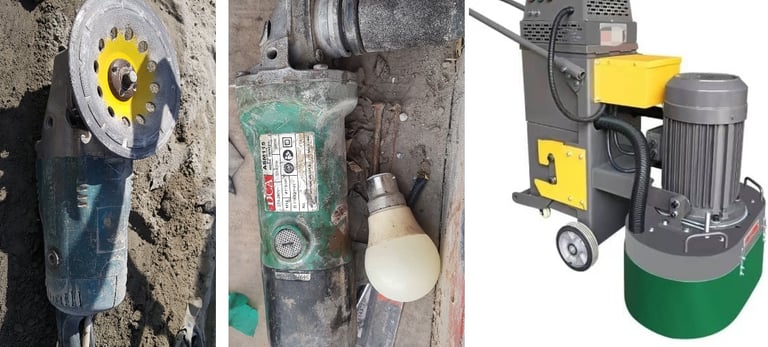
1. Grinder
You will need three grinders: the machine grinder, the baby grinder and the hand angle grinder

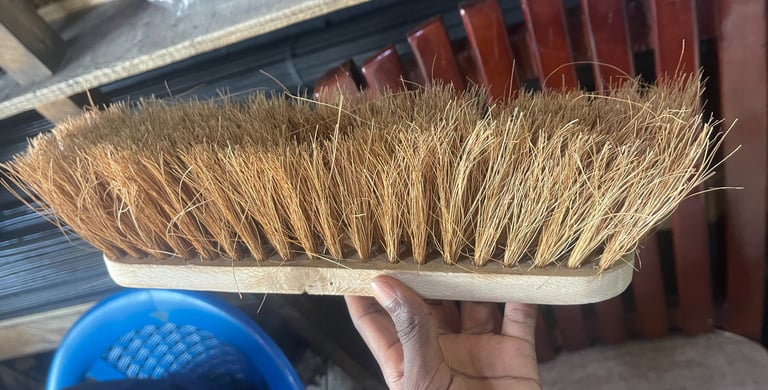
2.Soft brush

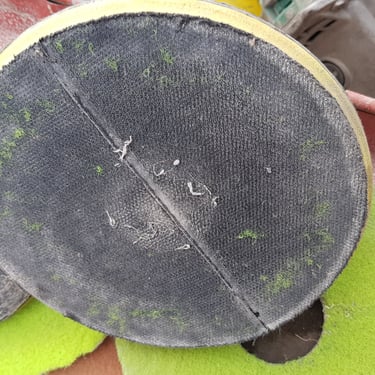
3. Pads and pad holders
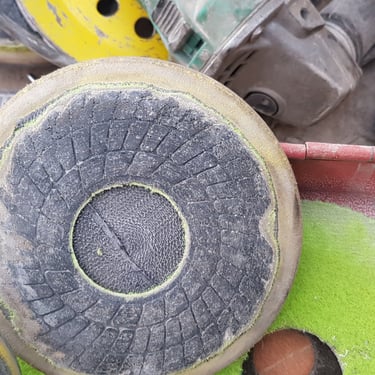
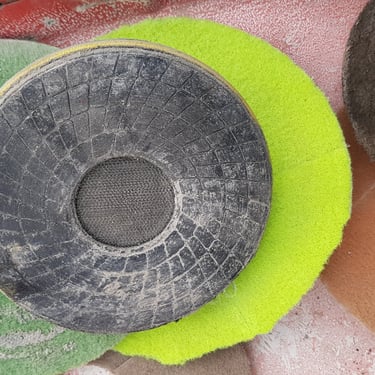
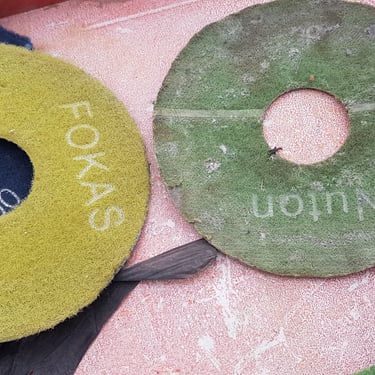
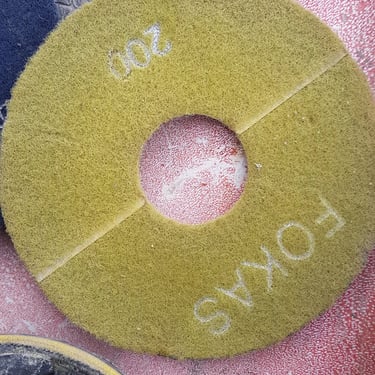
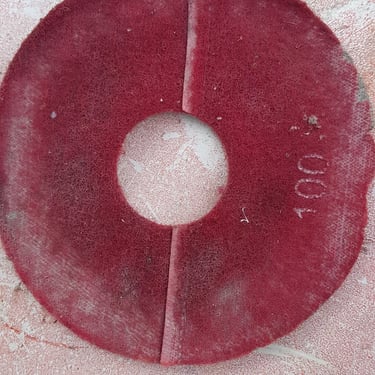
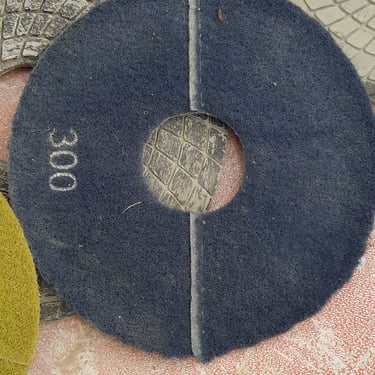
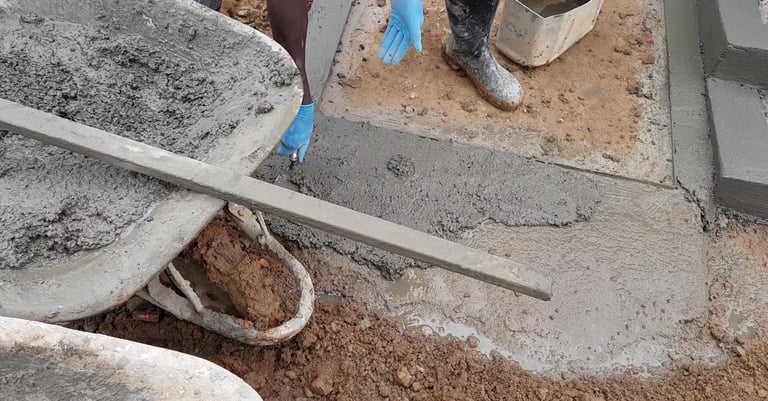
4.Wheel barrow transporting materials on site

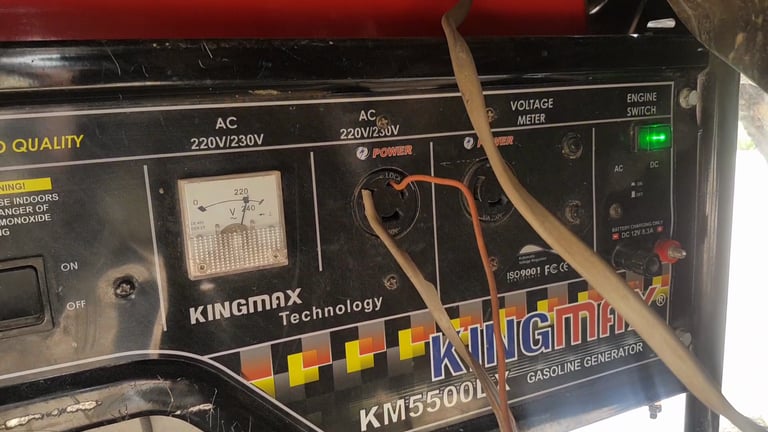
Power source for example, a generator or hydro electricity

6. Baby grinder
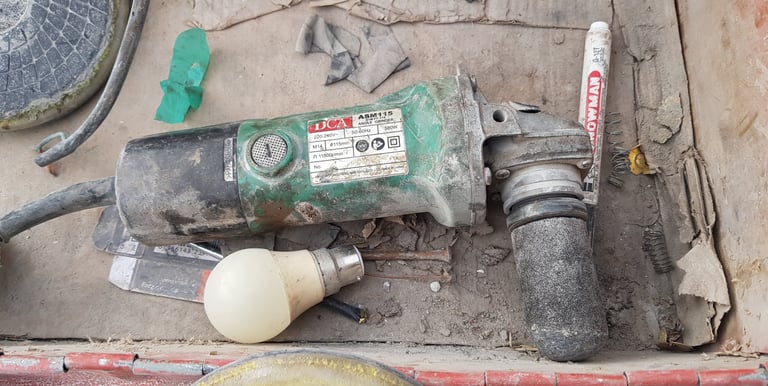

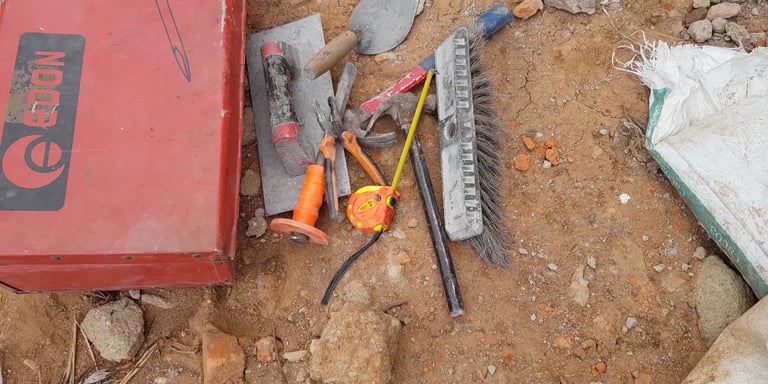
Other tools that you must have in your toolbox box include the steel float, tape measure, and screwdriver, among others

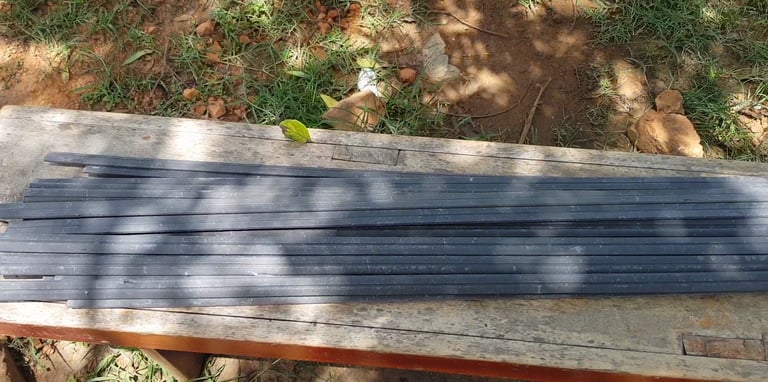
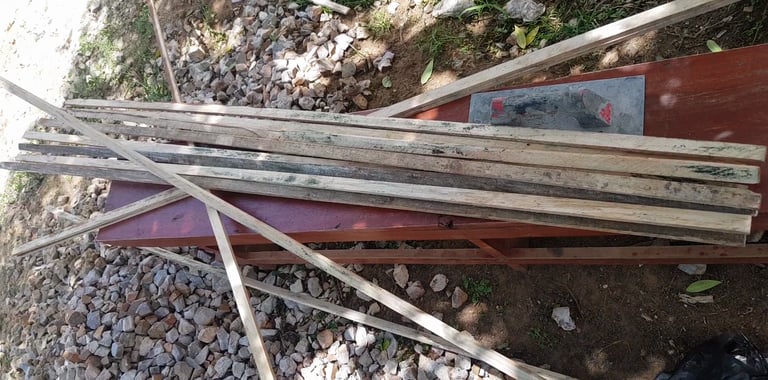
Other materials you will need to buy are strips and bidding sticks as shown below respectively


Step 2: Mixing Terrazzo Aggregates and Cement
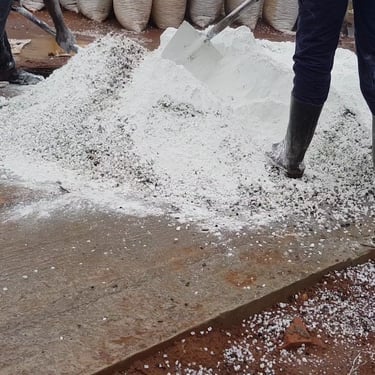
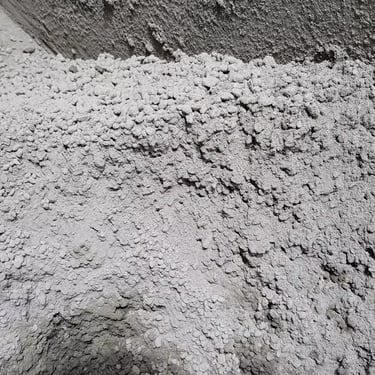
Once materials are estimated, the next step is mixing the aggregates with cement. The general mixing ratio is 1 part cement to 1.5 parts aggregates. This is how we usually do it.
1 bag of cement mixed with 1.5 wheelbarrows of aggregates.
Alternatively, mix 3 basins of aggregates with 1 bag of cement.
You can also add colour oxides to achieve your desired look. For example, when you add a red oxide at this stage in the mix, it will give a red tint to your flooring, or when you add a black oxide, it will create a darker finish. There are various colour oxides; you will need to choose from them. There are different oxide brands, including the ones made from Germany, India, and China. It is better to choose the one made in Germany, though its price is slightly higher. It’s usually 3 USD per kg, whereas the others have a slightly lower price

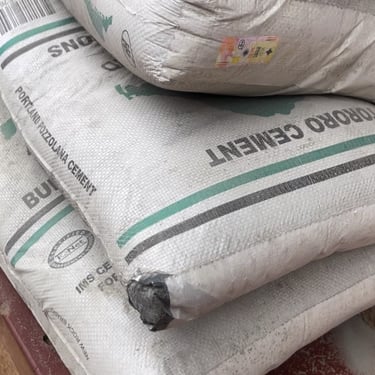
Choosing between ordinary cement and white cement
The choice between ordinary cement and white cement should depend on the priority of strength versus appearance.
When you are improving strength, it’s better to use ordinary cement usually in churches, mosques, commercial buildings, factories and industries, gyms classrooms or any other high-traffic areas
Cements usually have different classifications, so it’s better to know the different classes of cement before choosing the right kind of cement for your project.
I recommend using Portland cement (either CEM1 or CEMII) and also with a compressive strength of 42.5 and above instead of using the one of 32.5 when casting terrazzo floors.
On the other hand, when you are promoting beauty and creating a floor that is mirror-like and good-looking to the eye, for example, in hotels, residential homes, and museums. These places have low traffic, which is why we choose white cement on such occasions. To learn more about the different types of cement and their classifications, you can click here
Step 3: Installing Divider Strips
Usually, before even starting the whole process of terrazzo flooring, you have to fast do a cement screed on your whole floor
And then install the divider strips in the dried cement screed
Importance of divider strips
Divider strips are essential for creating designs and preventing emerging cracks in the flooring. The strips should be spaced not more than 2 meters apart, meaning that even if a crack emerges on the floor, it will stop at 2 metres where it meets the divider strip. These strips serve as guides for pouring and help control the flow of the mixture, preventing cracks by halting their progression to the entire room
Divider strips also serve the purpose of separating different colour designs on the floor. For example, when creating logos on the floor, flower designs or customized names or words, we use divider strips to separate different colour designs
A strip has 3 parts: the upper part, the middle part, and the lower part. The lower part goes into the existing floor.
The upper part is where the Terrazzo is cast. These strips are permanent and they remain in the floor even after grinding
There is a range of strip colours, including black, white, and gold, among others
The middle part separates the existing floor (cement screed) and the terrazzo floor on the upper part
The thickness of the strip is 50mm, 25mm goes under into the existing floor, and then when casting terrazzo, we cast in the reaming 25mm.
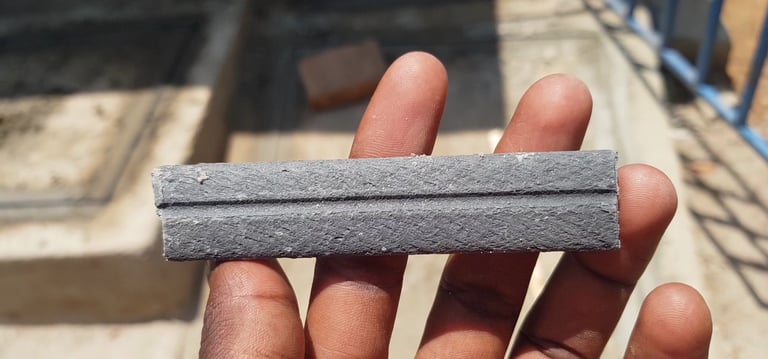

The strips guide us when casting terrazzo; we cast terrazzo up to the strip level
Clean the area with a soft brush before casting the terrazzo to ensure a clean and even surface.
Step 4: Fixing Temporary Bidding Sticks
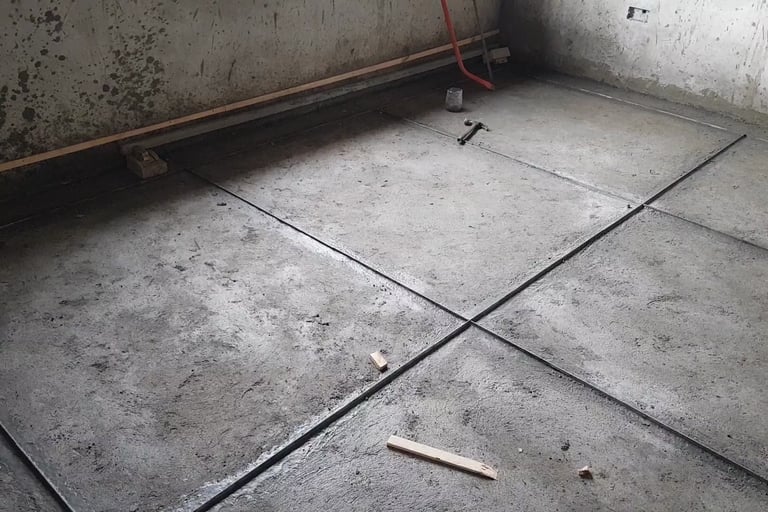

Temporary bidding sticks are used to mark straight lines for cutting and casting. These sticks guide the terrazzo installation, ensuring a uniform height and alignment throughout the process. Once the casting is complete, these sticks can be removed they are in most cases used to mark the height of the skirting
For example if we intend to have a skirting of 150mm, we place our bidding sticks at a height of 150mm from the floor level.
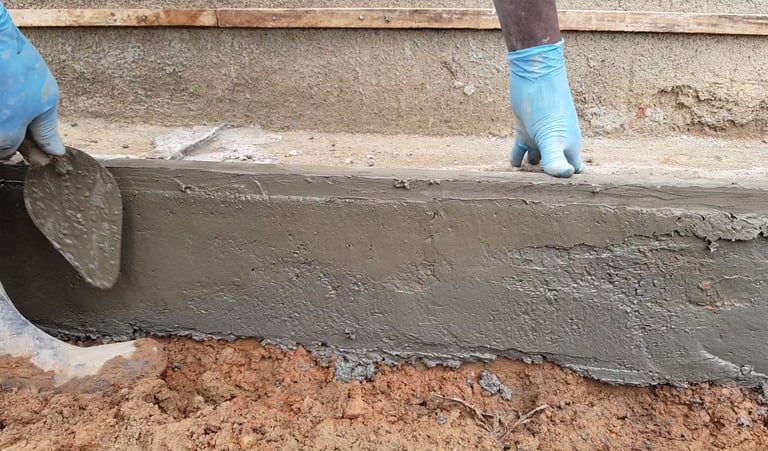

We fix them by simply hitting them with 1 and a half inch nails in the wall, and then after all work is done, we shall remove the sticks
Their thickness must match with the terrazzo thickness
Step 5: Clean the whole area
Clean the whole area with a soft brush, and then pour water on the floor ready to receive the terrazzo mix
Step 6: Casting Terrazzo
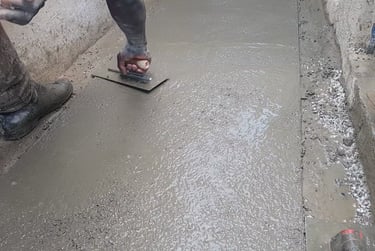

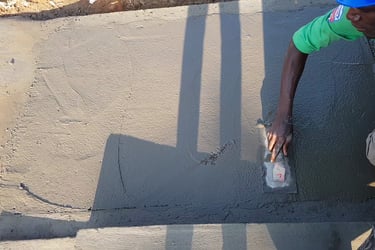

With everything in place, it’s time to cast the terrace. Pour the mixture of aggregates and cement onto the prepared surface. The amount of water used will vary based on whether you are casting on walls or floors. For floors, more water is needed to help the mixture bind properly and then, on the other hand, when casting terrazzo on walls, we use less water to avoid falling off of the mixture when still casting before it dries
Once poured, compact the mixture using a roller. This process ensures the aggregates settle well and removes the air voids
Note: After casting the terrazzo, when the mixture is still wet, use a soft brush to sweep on top of the wet mix of terrazzo before it dries. The soft brush is the most important tool in the whole terrazzo flooring process because, according to my experience or what I’ve seen in the past, when you skip this stage, you will be disappointed with the results. What will happen is that during the grinding process, the whole floor will have sunken parts or portholes, which are difficult to rectify
Therefore, in simple terms, to avoid these potholes or irregularities in the floor, cast terrazzo to the top level of the strip and then use a soft brush to sweep on the top of the wet mix to spread the mixture evenly on top and also cover all potholes that might be there. This will make grinding so easy
After casting, allow the mixture to cure for at least 7 days, although 14–21 days is recommended for optimal strength.
Step 6: Grinding Process
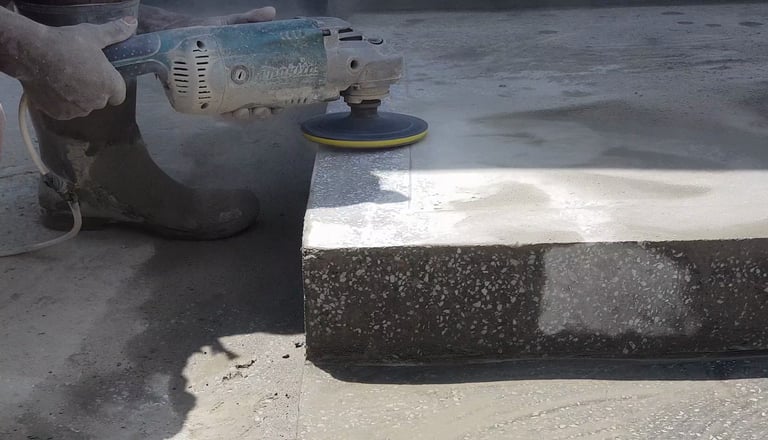

The grinding process is crucial for achieving a smooth finish on your terrazzo floor.
Where do we use a grinding machine, and where do we use an angle grinder?
You can use either a terrazzo grinding machine or a hand-angle grinder. When the area is large, let’s say halls, churches, mosques or class rooms, it’s better to use a grinding machine because it will do the work faster and smarter
Then, on the other hand, when the area is small, for example, for staircases, pit latrine floor, bathrooms, verandas, skirting or other small rooms, you can use a hand angle grinder
However, whether you use an angle grinder or the bigger machine, you get the same results.
The grinding process is divided into several phases, each using different pads to achieve varying levels of smoothness.
We use a baby grinder to grind in critical areas where the diamond wheel cannot reach, for example, when grinding around drop holes for pit latrines.
Grinding Phases
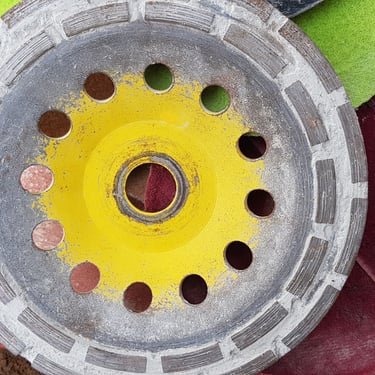
Phase 1: Use a diamond wheel or a diamond stone for initial grinding.
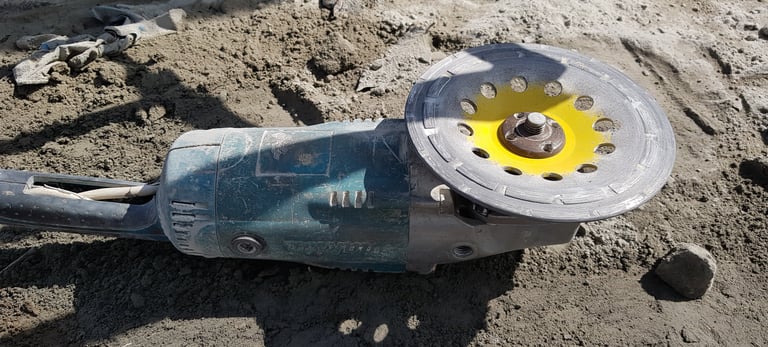

You either use a diamond wheel when using a hand-angle grinder or a diamond stone when using the grinding machine. It’s called diamond because it has a real diamond coating on top, strong enough to grind terrazzo flooring aggregates or stones with ease
After every phase of grinding, you have to wash the floor with clean water to remove the dust before grinding for the next phase
Phase 2: Apply pad 30 and also fill in any gaps with filler.
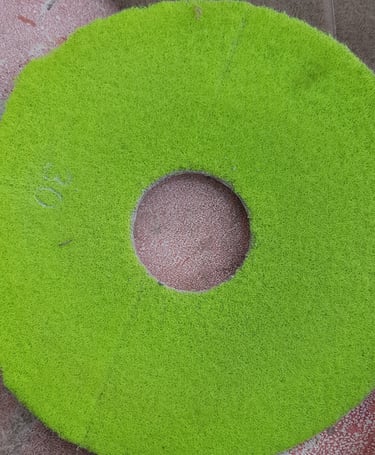

At this stage, there is a likelihood that there might be some small gaps, which we fill with filler. Filler in terrazzo flooring is simply a mixture of cement and the oxide that you used on that particular area. For example, if the intended colour of the floor is reddish brown, then filler is simply a mixture of cement plus red oxide. For a darker floor, the filler that we use to fill the small gaps or holes is simply a mixture of cement plus black oxide. After applying the filler, you have to first leave the floor to dry
Phase 3: Remove filler by applying pad 50
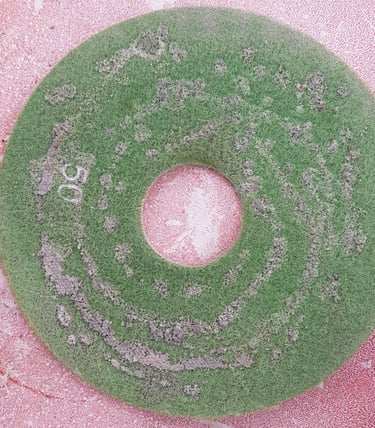

Phase 4: Ran either pad 100 or 150.
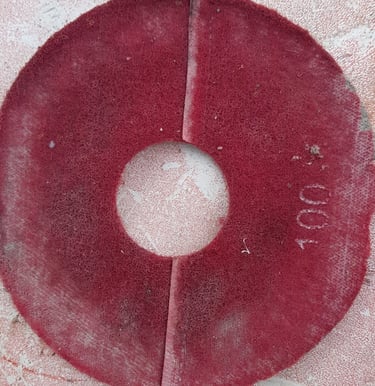

When I say "or,” I mean you use one of them, not both
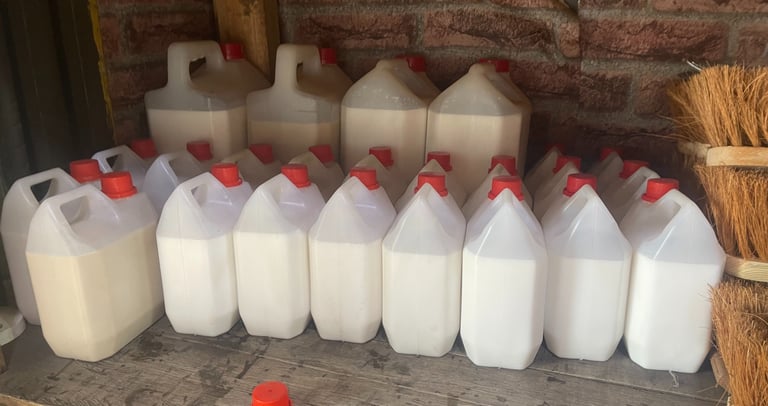
At this stage, you can wash and apply white premium self-shine polish and submit the work to the client
Polish like the one shown in the picture below provides a covering membrane on the floor to make it easy to clean and shine abit

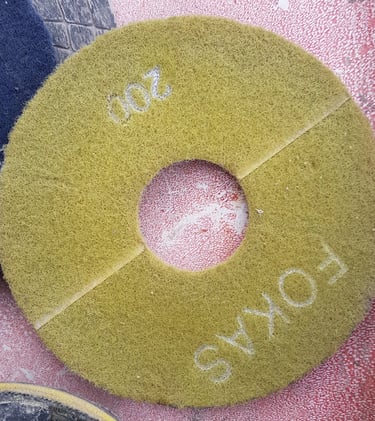

Phase 6: Apply pad either pad 300 or 400
You can wash and smear the floor with premium polish at this stage and submit your work
Phase 7: Use either pad 500 or 600
You can wash and smear the floor with premium polish at this stage and submit your work
You have to wash the floor before polishing
If you are considering something more luxurious, we move to the next step
Phase 8: Run pad 800 followed by pad 1000 followed by 1500
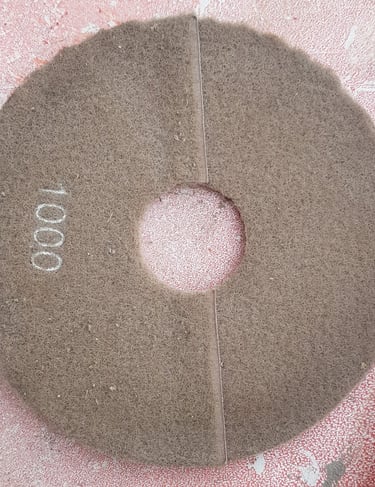

When I say followed by, I mean that you have to run all those pads in order
After running pad 1500, clean the floor with clean water; leave the floor to dry, and then smear the floor with bathing polish.
You can’t do bathing before you reach at least pad 800. You have the right to do bathing after pad 800
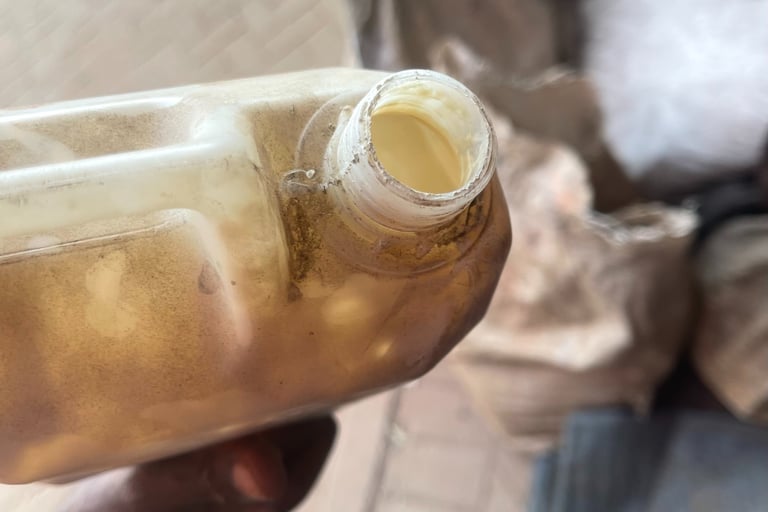

The liquid in the container above is called bathing; it has a cream-like colour.
After smearing the floor with bathing polish, ran the final pad 3000 to compress the bathing polish to have a final mirror-like glittering floor
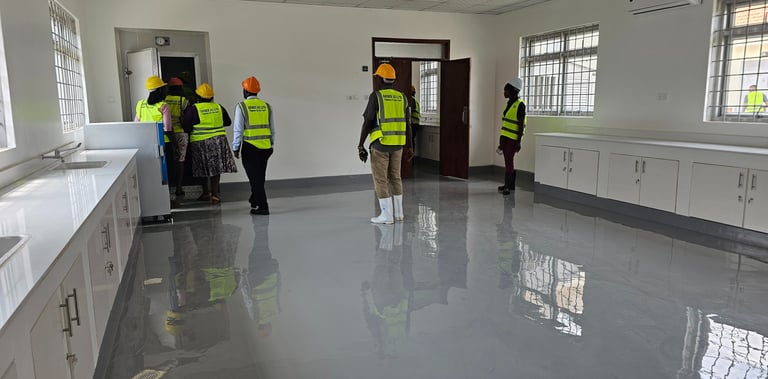

Final Step: Apply bathing polish and do final grinding with pad 3000 for to get a mirror-like shining floor.
Step 7: Final Touches and Maintenance
Remove carefully the bidding sticks, clean the floor properly with clean water and soap and then hand over the work to the client
what is the cost of a terrazo floor?
The average cost to cast 1 square metre of terrazzo around 17 USD, including labour and material here in my country when ordinary cement is used,
Whereas when white cement is used, 1 square metre will cost around 23 usd with all costs including labour and material
A bag of white cement costs around 20 usd and a bag of ordinary cement costs around 10 usd. One square metre including labour and mmaterial costs when white cement is used will cost around 25 usd whereas when ordinary cement cement is used one square metre will cost around 18 usd
The process for bathing alone will cost you around 7 dollars per square metre in my country
The price varies depending on the local price in different regions
Also customised designs, logos, and words may increase the cost slightly on top of the price charged per square metre
Understanding the costs associated with terrazzo flooring is vital for budgeting. Costs can vary based on materials, labour, and the complexity of the design.
Factors to consider include:
Types of aggregates and cement used.
Labour costs for installation and grinding.
Additional costs for colour oxides and sealants.
Equipment rental or purchase for grinding.
It's advisable to get the best professional when casting terrazzo for your floor.
Conclusion
Creating terrazzo flooring is a meticulous process that, when done correctly, results in a stunning and durable surface. From estimating materials to the grinding process, each step is crucial for achieving high-quality results. Whether you're a DIY beginner or a professional in the construction field, understanding these steps will enhance your skills and knowledge in terrazzo flooring.
For more information or specific questions regarding terrazzo flooring, feel free to reach out. Your feedback and enquiries are always welcome.
Frequently Asked Questions
1. What is the insitu terrazzo flooring process?
In-situ terrazzo flooring is the kind of flooring system where the terrazzo mixture is prepared and poured to its position on site. The method allows you to customise the terrazzo design, for example, by writing words, flowers, and logos on the floor.
2. How do you cast in-situ terrazzo flooring?
To cast in-situ terrazzo flooring, you must first prepare and cast a cement sand screed on the floor that is on level. Any mistake in the cement sand screed with levels will also be in the finished terrazzo floor, and that’s why it is important to ensure that you do the cement sand screeding properly before casting the terrazzo.
Next you install the divider strips, install the bidding sticks and then clean the floor properly with a soft brush.
The terrazzo flooring materials, which typically include terrazzo flooring aggregates and cement, and then any oxide of your favourite colour. You can decide to leave the oxide if you don’t want colour designs.
The mixture is mixed with water and then poured on the floor, spread evenly, compacted and then allowed to cure. After curing, the floor is ground using a diamond wheel followed by a range of pads. After the grinding process, the final step in the in-situ terrazzo installation process involves polishing the floor with a premium self-shine polish or doing a bath to have a mirror-like glittering floor.
3. What materials are used for in situ terrazzo flooring?
The major materials used for in-situ terrazzo flooring include cement and terrazzo flooring aggregates. Other materials required include divider strips, bidding sticks, an oxide in case you want different colour designs and water to mix the materials to the required workability. Casting terrazzo flooring involves mixing these materials to have a complete terrazzo floor.
4. Do I need sand when casting terrazzo?
Sand is not so much necessary when casting terrazzo flooring. The only stage where we use sand is when installing divide strips. The cement-sand mixture helps to hold the divider strips firmly into the floor.
Therefore, for a big project, you might need a wheelbarrow or two, enough for installing the divider strips.
5. How thick should the terrazzo floor be?
The cement-based terrazzo is usually 25 mm thick. We arrive at this thickness simply with the help of divider strips. Divider strips are 50mm thick with a lining in the middle which separates the divider strip into 2. The bottom part, which is 25 mm, goes down into the existing floor (the cement sand screed), and then the remaining 25 mm remains floating on top to receive the terrazzo mixture. So, when pouring terrazzo, we stop at the top level of the strip, which brings us to the conclusion that the terrazzo floor thickness is 25 mm.
6. How long does it take to cast in situ terrazzo flooring?
The time for in-situ terrazzo installation can vary depending on the size of the project and the complexity of the design.
For small or medium-sized projects, the process of casting terrazzo flooring can take up to a month because there is one week for allowing it to dry before grinding. Some people do grinding 3 days after casting, which I don’t see any problem with, though personally I leave the floor to dry at least for a week. The standard should be 14-21 days. This period allows cement to achieve its maximum strength.
7. What are the common mistakes when casting in situ terrazzo?
The commonest mistake during in situ terrazzo installation is failing to use a soft brush to sweep on top of the floor when the mix is still wet. Failure to do so, at the time of grinding, you will find very many holes in your floor which are a bit difficult to rectify.
The second mistake is casting terrazzo in a floor which is not on level. The floor will automatically have dips even after casting the terrazzo since, when casting terrazzo, we simply follow the top level of strips.
And that’s why it is important to always use levelling tools to ensure that the floor is on the correct level or slope.
The 3rd common mistake is casting terrazzo on a weak improper subflooration, which will automatically lead to cracks in the finished terrazzo.
8.Is insitu terrazzo flooring suitable for high-traffic areas?
Yes, terrazzo floors are highly durable and highly suitable for high-traffic areas, and that’s why terrazzo flooring is a popular choice for commercial buildings, hospitals, schools, airports, churches and other high-traffic environments.
Here are some of the questions I was asked when I uploaded a video on YouTube about casting in situ and terrzzo flooring.
9.After putting the mixture, do you remove the strips?
After casting the terrazzo mixture in the floor, you don’t remove strips; you leave the strips there. The strips act as a guide when grinding. When you are grinding and you meet a strip, in the back of your mind you know you don’t need to go any further. They stop the spreading of cracks in the floor. That's why it is important to leave the strips there after casting in situ the floor.
10.Is it possible to do phase 8 and later, or do all phases have to be done at once?
You can do phase 8 and bathing and a later stage whenever you want, even if you are already using the first. It's not a must that you must do it at the time of doing all these phases. phases
11.How many days apart do you apply the different pads to achieve the type of surface you want?
No days part, you can finish grinding using a padone padd right now, clean the floor with water to wash away the dust and then start grinding using another immediately.
12.We recently did an in-situ terrazzo installation, and we are now at the first stage of grinding; however, we noticed that while grinding, the floor leaves hollow spots in places. Is the grinder thrash, or was it something else?
First and foremost, the cause of the small holes is that a soft brush was not used. Use a soft brush to sweep on top of the wet mix after casting to ensure that the wet mix spreads evenly
How do we go about it? We fill those small holes with filler. Terrazzo filler is a simple mixture of cement and the oxide that you used when mixing the terrazzo. So, first complete the first stage of grinding using a diamond wheel or a diamond plate, clean the floor with clean water to wash away the dust and then apply filler.
Leave it to dry at least 24 hours, and then remove the filler with pad 50.
13.What is the weight of aggregates?
Usually 40 kg per bag
14.What should be the thickness of the cement sand screed?
The screed should be 25 mm. This is because the strip is 50 mm, and it is divided into 2; therefore, 25 mm goes into the screed, and 25 mm is for the terrazzo mix on top of the screed.
15.Do you mount dividers at the same time you are laying the cement sand screed?
Personally, I usually do it separately. I first do the cement sand screed separately, then mount the strips or divider separately, though you can still mount them when the mortar is still wet if you want.
16.How long do you leave the cement sand screed to harden before you lay terrazzo?
You may consider 7 days. Any amount of days, as long as the floor has hardened properly to avoid any unwanted breakages at the time of installing divider strips.
17.Do you have to apply any bonding agent to the cement bed before you lay the terrazzo? If yes, what type of bonding do you use?
Yes, simply make a watery mix of cement and water and pour it on top of the cement sand screed before applying the terrazzo mix.
18.Do you smooth the cement sand screed before you cast terrazzo, or do you keep it rough?
Do a wooden float finish while maintaining the required levels before casting terrazo
19.When doing terrazzo flooring, how much oxide should I use or mix?
It entirely depends on the colour design that you want; the more oxide, the more the floor will look like the oxide. The rest is your art.
20.Is premium self-shine polish the same as bathing?
They are different; bathing requires going up to pad 800 and above. You can’t do the bathing before you reach pad 800, whereas you can still smear the floor with premium self-shine polish even after pad 50.
21.What does pad 50 or pad 800 mean?
The number on the pads explains the strength or aggressiveness of a pad measured in grits.
22.Is it possible to grind an ordinary cement floor with a final pad of 500-700?
Yes, its abslutely fine
23. Does Terrazzo need sand?
We only mix cement and terrazzo flooring aggregates or stones plus an oxide of your favourite colour and water.
24.Is it necessary to run all those pads?
It entirely depends on the smooth surface texture that you want. The more pads, the more it becomes good-looking.
25.How many kilograms are in one bag of white cement and ordinary cement?
Ordinary cement is usually in packs of 50 kg, whereas white cement is usually in packs of 40 kg. It varies for different countries or regions.
26.How do I clean a terrazo floor?
To clean a terrrazo floor, use a broom to sweep or a vacuum to remove dust then mop with a terrazo floor cleaner. Periodically re-grind, polish and seal terrazo flooring to maintain the shine
27. How do you restore or refurbish your terrazo floor?
Terrazo restoration is so simple. You simply have to simply regrind with one or two pads and re-polish again