How to Build a Ventilated Improved Pit Latrine from Start to Finish
As a civil engineer with years of experience in WASH projects, I’ve prepared an easy step-by-step guide on how to build a ventilated, improved pit latrine from start to finish that meets WASH standards.
PUBLIC HEALTH ENGINEERING
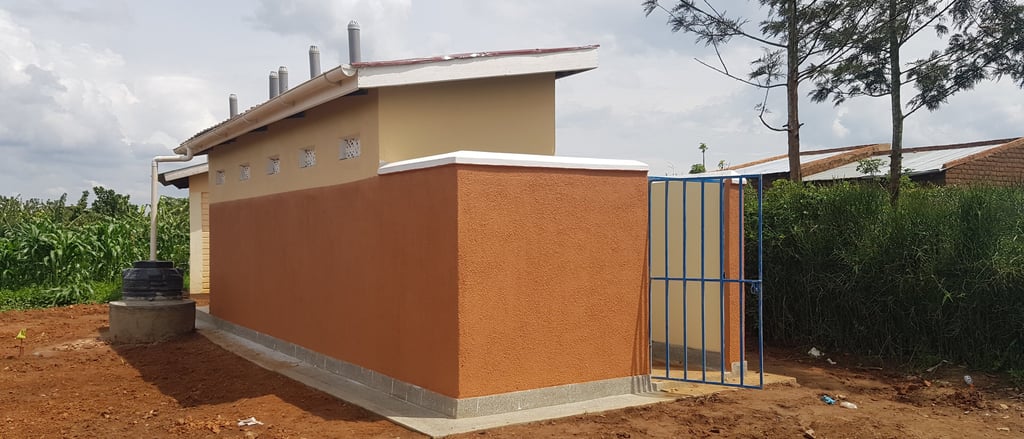

How to build a ventilated improved pit latrine
Table of Contents
What is a Ventilated Improved Pit Latrine?
Materials Needed to Build a VIP Latrine
Step-by-Step Process to Construct a VIP
a) Site Clearance
b) Setting Out and Excavating the Pit
c) Casting the Concrete Base
d) Raising the Walls
e) Casting the Intermediate Ring Beam
f) Painting the Pit
g) Formwork and steel fixing for the top slab and ground beam
h) Building the Urinal Walls, Splash Apron, and Wing Walls
i) Casting concrete for the top slab, ground beam, and urinal area
j) Laying the Damp Proof Course (DPC) and Building Walls
k) Casting concrete for the ring beam
l) Roofing the Structure
m) Installing Doors and Fixtures
n) Plastering and Flooring
o) Creating a Soak Pit
p) Terrazzo Flooring
q) Painting
r) Mechanical Installations
Important Considerations
Final Touches
Frequently Asked Questions (FAQs)
Core concept or idea
Constructing a ventilated, improved pit latrine is an essential skill in public health engineering meant to act as a waste disposal system to improve sanitation and hygiene in both urban and rural areas.
As a civil engineer with years of experience in WASH projects, I’ve prepared an easy step-by-step guide on how to build a ventilated, improved pit latrine that meets WASH standards. The method that I use in this post is better because you use locally available raw materials with low operating costs and low capital costs. It is also simple and easy to understand by everyone, so be sure to read this post till the end because you don’t want to miss this.
What is a Ventilated Improved Pit Latrine?
A VIP pit latrine is a sanitation facility that collects human waste in an underground pit. When the pit is almost full capacity, a sewage truck pumps out the waste to a sewage treatment plant for further treatment.
Materials needed to build a VIP latrine
I. Structural Materials
Steel bars Bricks Sand, cement, and aggregates
II. Ventilation and Plumbing
Vent pipes PVC pipes Gutters, brackets, PVC tank, tap, and plumbing accessories
III. Roofing Materials including
Timber, nails, Iron sheets
IV. Flooring (Optional)
Terrazzo (if considering a terrazzo floor)
V. Slab reinforcement BRC mesh for slab reinforcement
VI. Formwork
Timber
VII. Finishing
Paint
VIII. Doors and Installations
Metal grills or doors Other mechanical installations
Step-by-step process to construct a ventilated, improved pit latrine
Site clearance
Cut off small trees or shrubs; excavate top soil not exceeding 250 mm depth all around the working area and dispose away from the site
Setting Out and Excavating the Pit
Set out the dimensions based on the number of users and also based on the structural engineer’s drawings if you have them. We are going to use an example of a five-stance pit latrine.
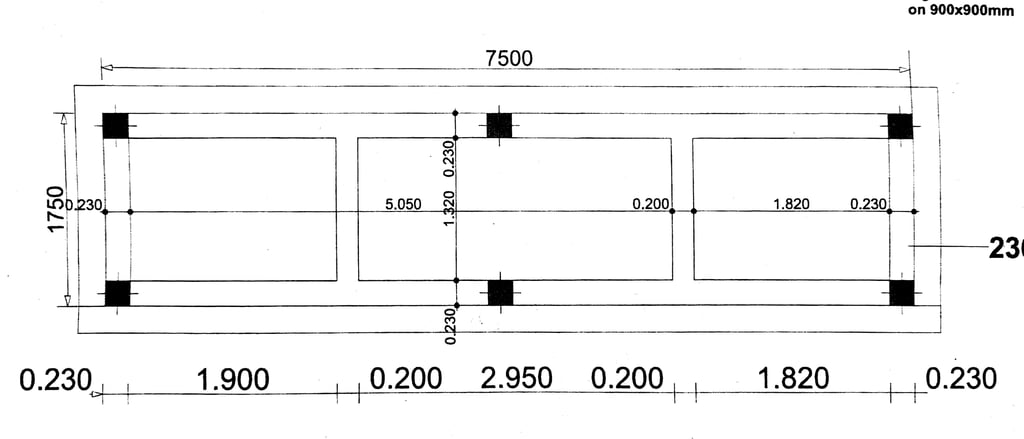

For example, for five stances or five doors, the dimensions are 7.5 meters in length and 1.75 meters in width as shown in the picture above. To allow for working space, excavate an additional 0.5 meters around the perimeter, resulting in dimensions of 8.5 meters by 2.75 meters.
The pit depth should be approximately 3 meters (approximately 10 feet), determined by site conditions, and should not interact with the water table.
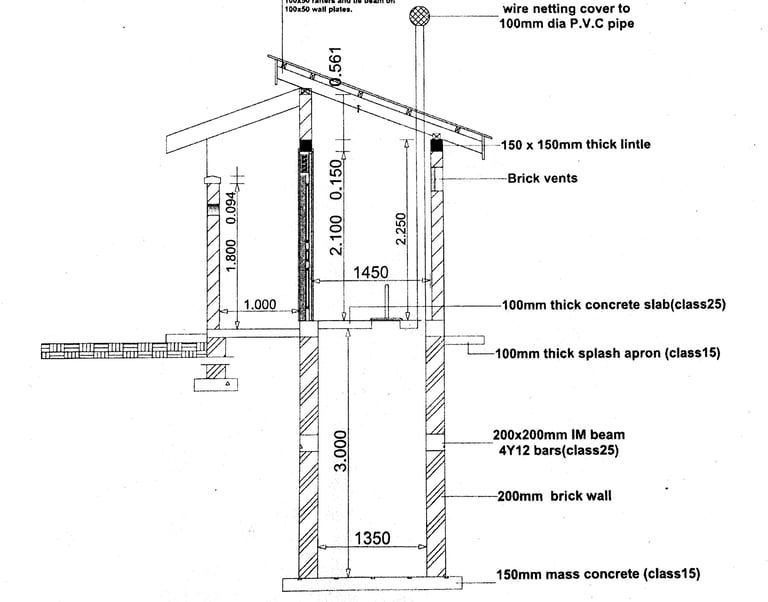

Dispose of the top black soil away from the side; you can leave the marrum on site for backfilling. If the area has weak soils, be sure to dispose of all the excavated weak soil away from the site and use imported marrum for backfilling at a later stage.
You have to excavate a little bit deeper at positions where columns will be fixed.
Apply anti-termite treatment to the sides and bottom of the pit to prevent termite damage.
Casting the Concrete Base
Cast concrete for 6 columns, 4 at the corners and 2 in the middle.
Next, cast a 150-mm-thick mass concrete of grade 15 with a mix ratio of 1:3:6 (1 part cement, 3 parts sand, and 6 parts aggregate). The columns should include Y-16 steel bars with R8 rings spaced at 150mm centre to centre for added strength.
Raising the Walls
Construct the walls using well-burnt clay bricks with a thickness of at least 200 mm. Personally, I use clay bricks of 230 mm in thickness. The internal wall height should reach 3 meters total height.
Cast concrete for the intermediate ring beam
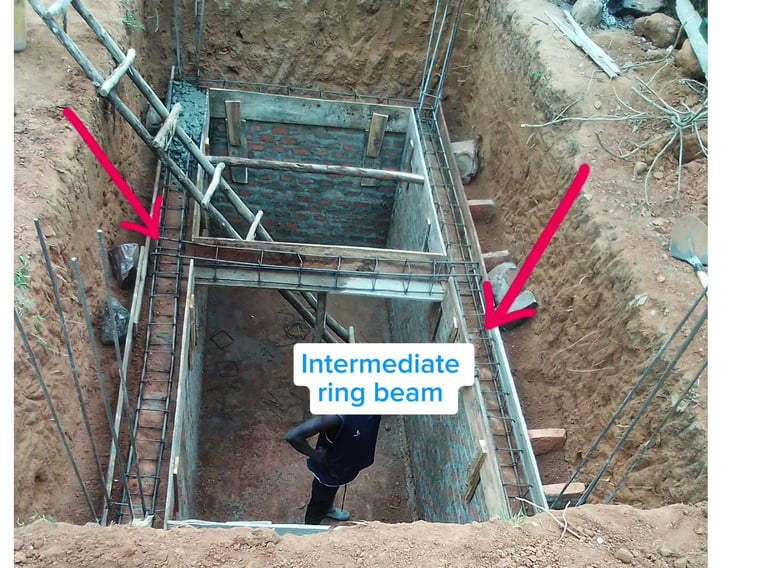

First raise the walls to a height of 1.5 meters, and then do formwork for a 200mm thick intermediate ring beam, which should be added. Use grade 25 concrete with a mix ratio of 1:1.5:3. You can use this mix when casting concrete for the beams and columns. Use steel bars of y12 and rings of r8 at a spacing of 150mm centre to centre.
After casting concrete for the intermediate ring beam, raise the wall for the remaining height up to the ground level.
It is crucial to backfill around the walls after the wall has dried fully to prevent water logging from the back side, which can compromise the structure.
Note: You have to backfill in layers as you compact the soil. Failure to do so, backfilling anyhow will cause the soil to settle after some time; when it settles, the finished splash apron will develop cracks (as a must), hence requiring redoing, so be sure to always backfill in layers while compacting and pouring their water into the soil at the same time to avoid any issues that may arise down the line.
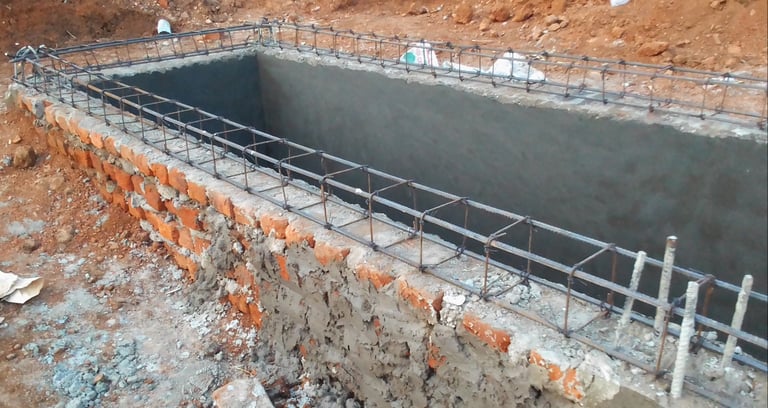
The next step is to do plastering on the inner surface of the pit. Plaster properly the bottom and the sides of the pit, the whole inside part, including the intermediate ring beam. You can use a plaster mix ratio of 1:4, which is 1 part cement and 4 parts sand. Be sure to add water-proofing powder or liquid to the plaster.
When plastering the walls at the time of finishing on the wall, use a watery mix of cement and water to do a steel float finish.
Painting the inner surfaces of the pit.
Apply 3 coats of black bituminous paint to the plastered surfaces inside the pit.

Formwork and steel fixing for the top slab and ground beam
Prepare for the top slab by creating formwork and fixing steel. The layout will vary depending on the number of users. For a larger latrine, ensure to include enough steel bars for stability. Create space for the manhole cover when doing steel fixing.
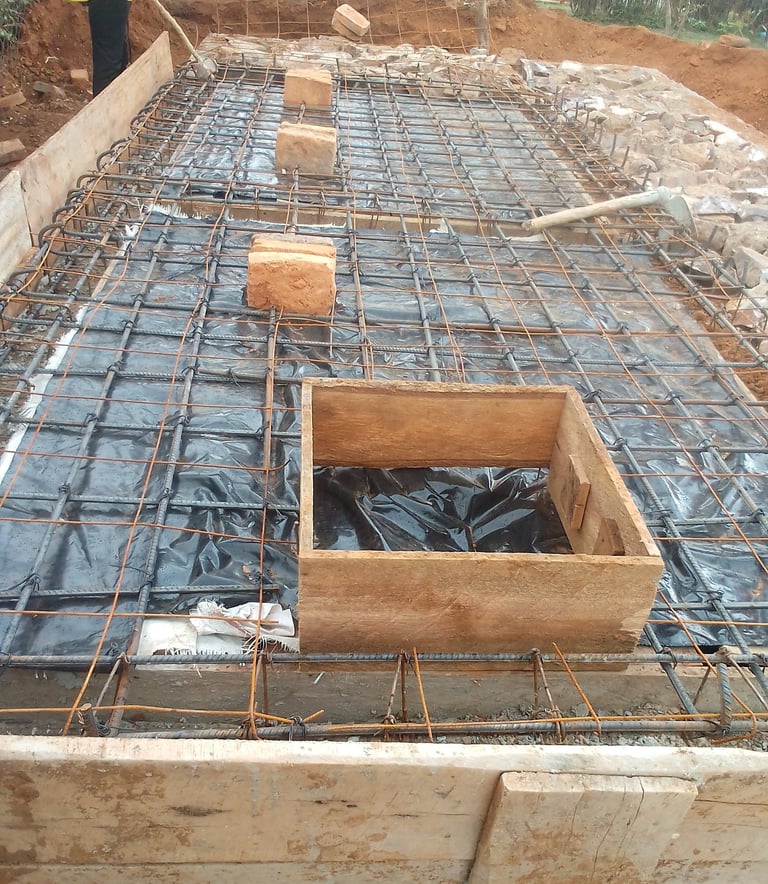

Prepare for the top slab by creating formwork and fixing steel. The layout will vary depending on the number of users. For a larger latrine, ensure to include enough steel bars for stability. Create space for the manhole cover when doing steel fixing.
Build the plinth wall for urinals and splash apron wing walls.
Cast a strip foundation to receive the plinth wall for the urinal. The wall for the urinal should be built up to the level of the existing wall for the pit.
For the case of the splash apron, you can decide to build it at this stage or at a later stage.
Casting concrete for the top slab and ground beam and the urinal area
Cast the concrete for the top slab, ground beam, and urinal area simultaneously. (Cast at the same time and on the same level) Use grade 25 concrete with the same mix ratio as before. Vibrate the concrete during casting to prevent segregation and ensure a solid finish. The concrete for the slab should be 100mm thick
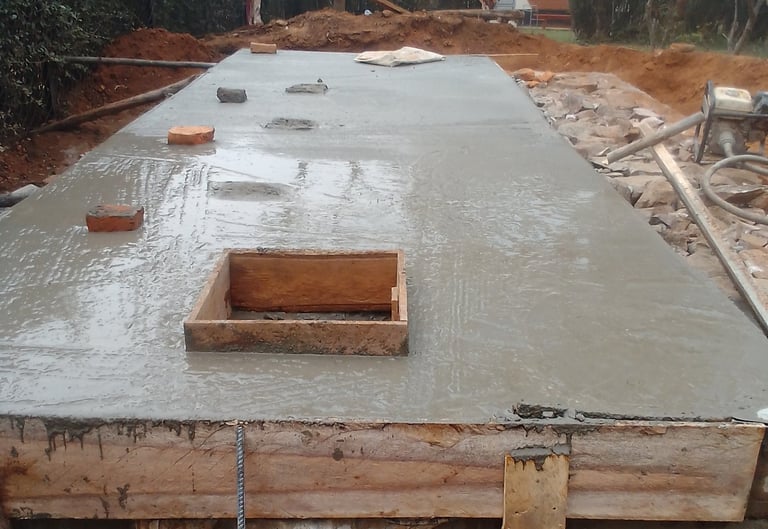

Casting concrete for the top slab and ground beam and the urinal area
Cast the concrete for the top slab, ground beam, and urinal area simultaneously. (Cast at the same time and on the same level.) Use grade 25 concrete with the same mix ratio as before. Vibrate the concrete during casting to prevent segregation and ensure a solid finish. The concrete for the slab should be 100 mm thick.
We use steel bars of y12 in the slab, cast concrete of mix ratio 1:1:1.5:3, provide a provision for the manhole at the extreme end of the slab to provide access to the slab for any repairs in the future
Laying Damp Proof Course (DPC) and Building Walls
After the slab has cured, lay the damp-proof course and continue building the walls. Reinforce the walls with horizontal hoop iron after every three courses; the mortar mix for brickwork should be 1:4 (1 part cement and 4 parts sand).
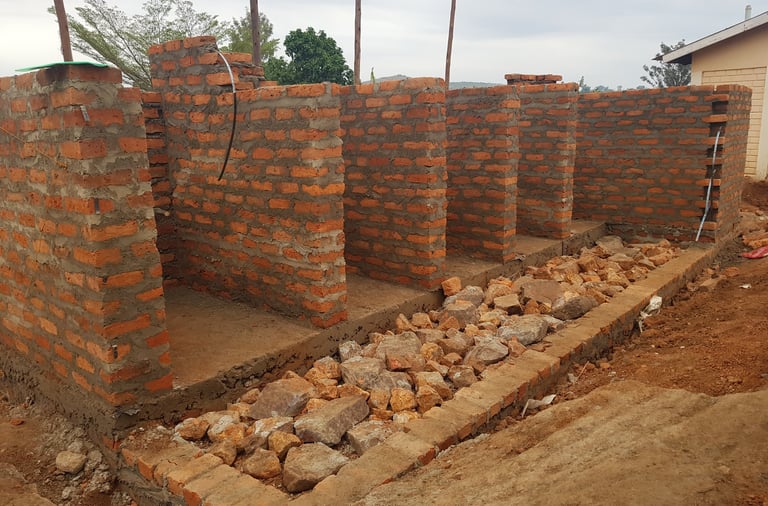

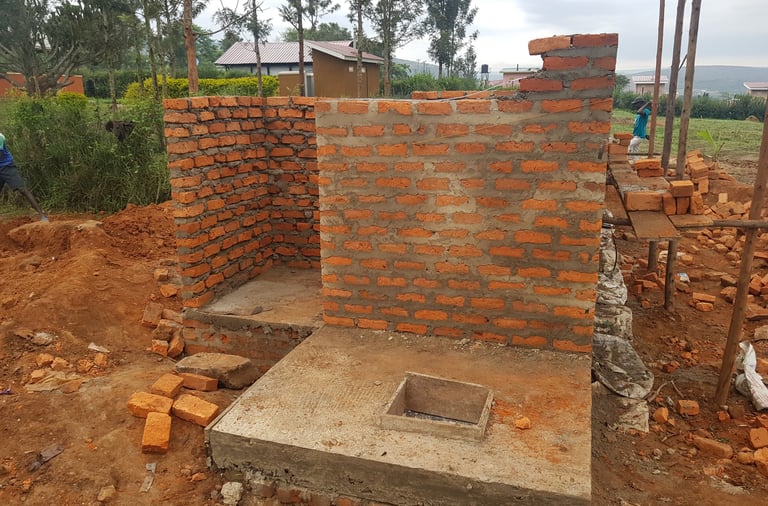

Casting Concrete for the Ring Beam
Cast a ring beam that covers the perimeter of the structure. This beam provides additional support and stability. Use a mix ratio of 1:2:4 for this concrete. After casting, continue adding courses to the walls as needed.
If you are a contractor Some times, wash structural drawings will tell you to cast concrete as a lintel instead of a ring beam. In simple understanding, a ring beam covers a small part, whereas a lintel covers a small specified part.
Personally, whenever building these pit latrines, I never cast lintels; I just do it as a whole and cast concrete for the ring beam for the entire structure to avoid any chance for any cracks emerging in the wall at a later stage. After all, the additional cost is not much since these are small structures.
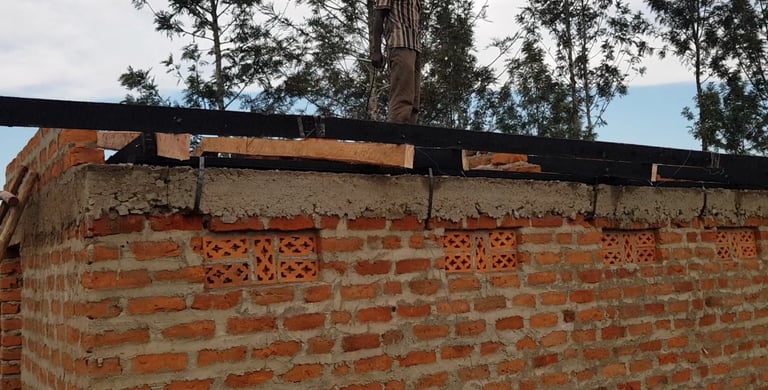

Roofing the Structure
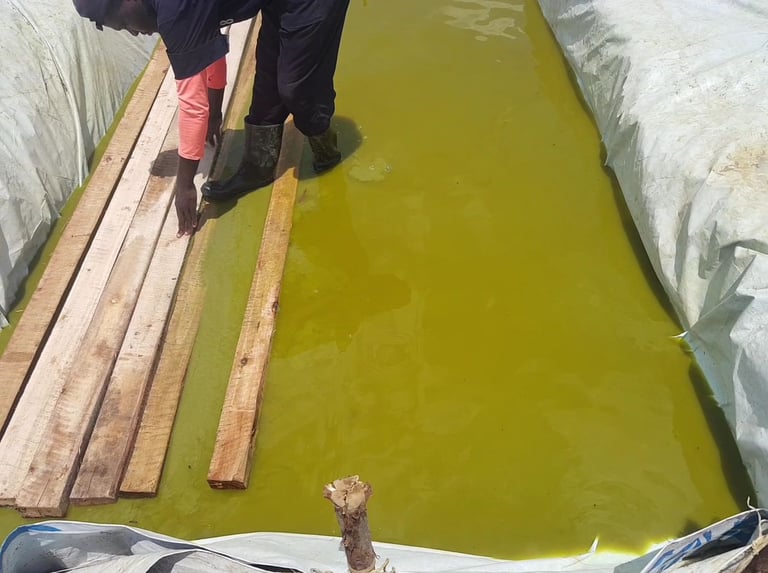
Treat timber first against termite damage using Tanalith chemical, as shown in the picture below, before forming the roof structure.

Use a shade roof and then gable roofs on the side for the disabled; begin with the wall plate timber. Install rafters, purlins, and lastly, install the iron sheets. iron sheets on to as simple as that.
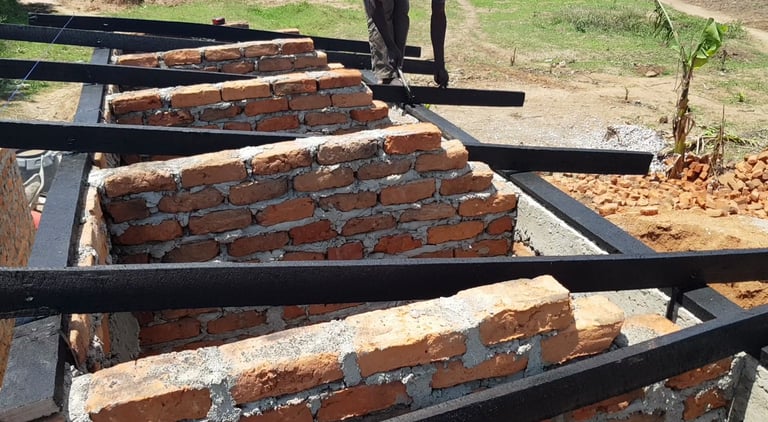

Use a shade roof and then gable roofs on the side for the disabled; begin with the wall plate timber. Install rafters, purlins, and then install the iron sheets.
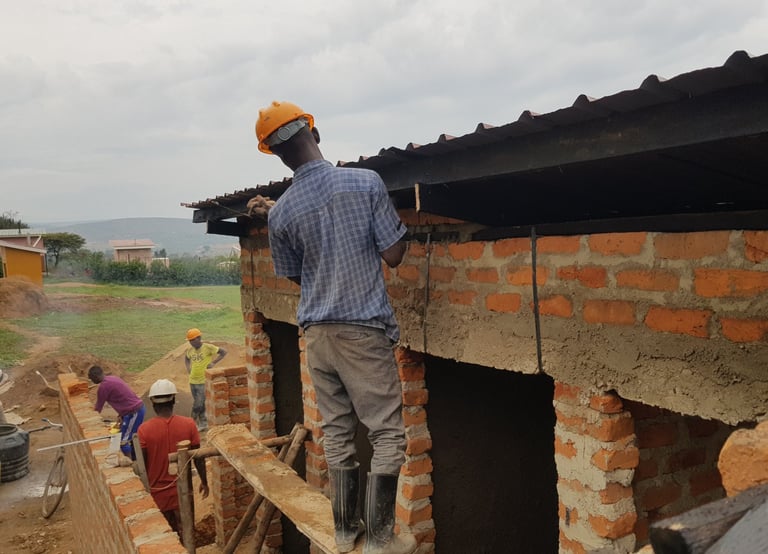

Fix facia boards all around the perimeter of the pit latrine. You have to paint the facial boards while they are still on the ground if you are using wooden facial boards; if you are using plastic facial boards, just simply fix them; those don’t need any painting.
Installing Doors and Fixtures
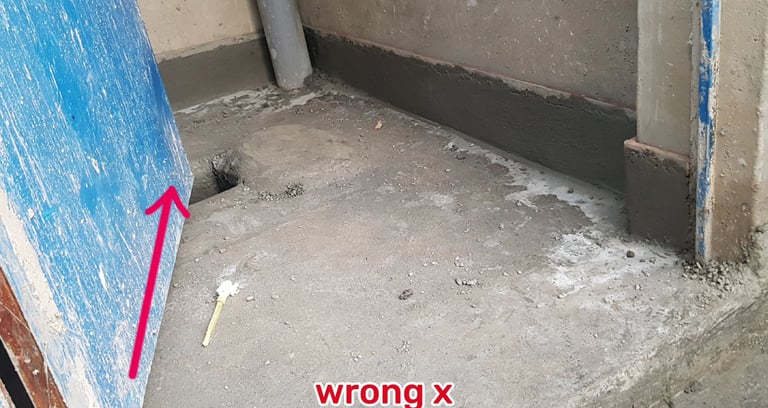
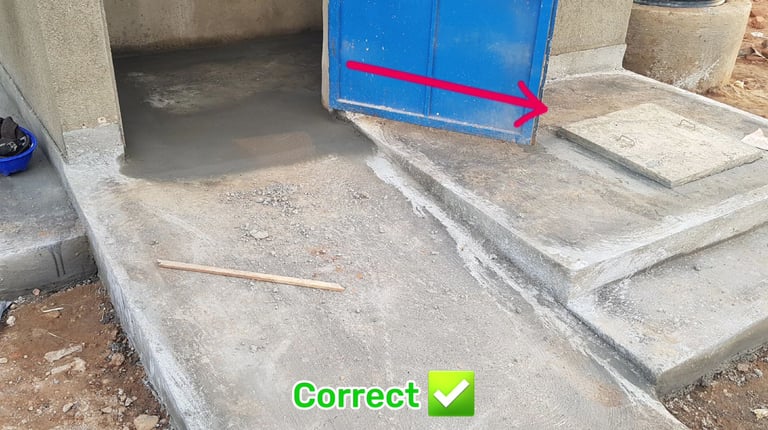
Install doors and metal grills, ensuring they are plumb and secure. When fixing doors, make sure that the door at the section for the disabled opens from outside to create enough space inside. Do not make the mistake of making the door open from inside, as it will hinder the turning of the wheelchair inside.
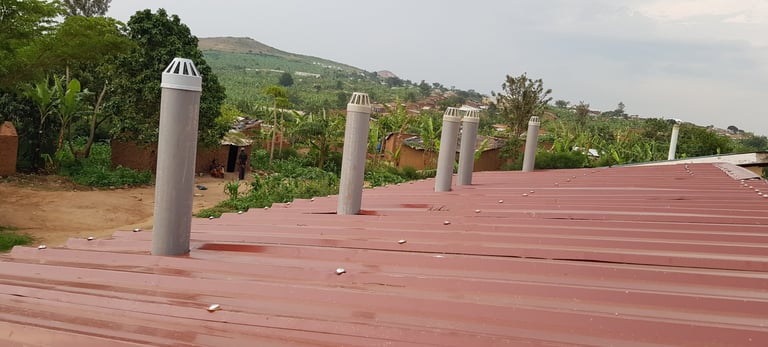
Also install vent pipes for each stance.
These pipes should have a flytrap on top, and they should be 600mm above the roof covering as shown in the picture below

Plastering and flooring
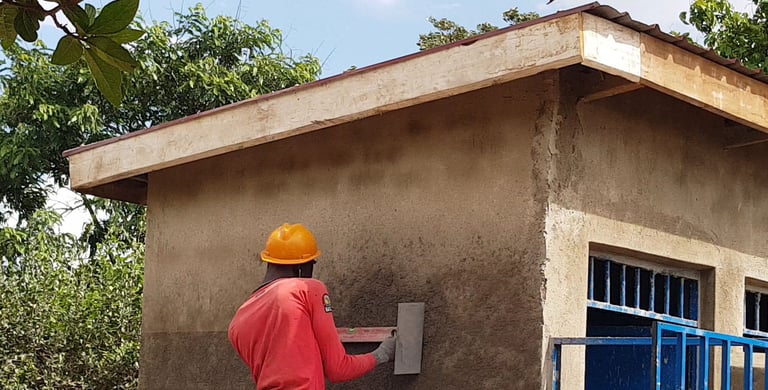
Plaster the walls using a 1:4 mix for a smooth finish. Floors should be done with a wooden float finish, whereas all walls should be done with a steel float finish.
How to do proper flooring for a pit latrine
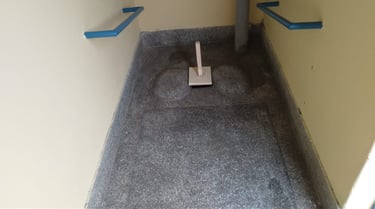
When doing flooring, make sure that the edges of the drop holes are chamfered (curved) to allow easy falling of urine or waste water into the drop hole.
The floor of the pit latrine should also be sloped towards the drop hole for easy cleaning and hygienic reasons.
When doing flooring for the corridor near the curtain wall, also make sure that it is sloping towards the outside for easy cleaning.
When doing flooring for a pit latrine on the section for the disabled, make sure that the access ramp rises to match the floor level so as to make it easy for the wheelchair to move seamlessly and easily from the access ramp directly to the inside of the pit latrine.
Ensure that the flooring slopes towards the drop hole for efficient waste disposal.
Also install a wall coping on the curtain wall and the side for the urinal.
Apply roughcast on the walls up to a height of 1.8 meters from the floor level.
Fixing handrails in the section for the disabled
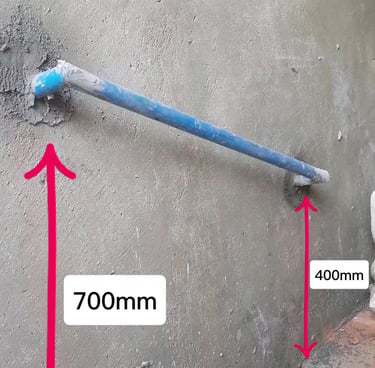
Fix handles on both sides to provide support for the disabled while using the pit latrine
Fix 25-mm-diameter circular pipes on the wall in the section for the disabled to act as handles when easing themselves.
One side will be 700mm, then the other side will be 400mm, directly centred on the wall at the position where there is a drop hole.


Creating a Soak Pit
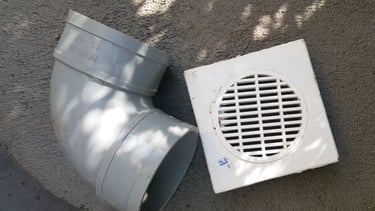
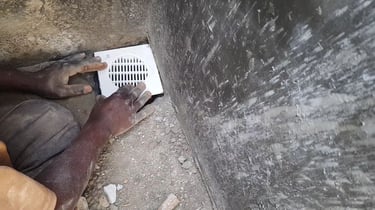
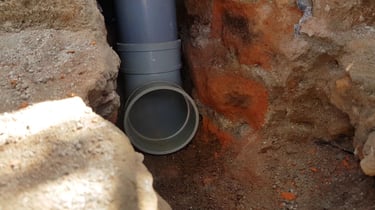
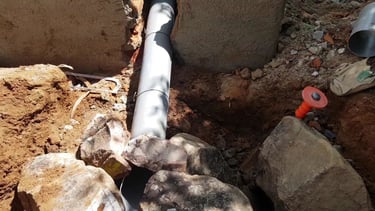
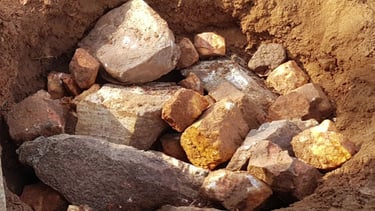


Establish a soak pit to manage waste water. This pit helps absorb waste water and urine from the urinal, preventing overflow.
Soak pit approximate size 2.5 m diameter and 1.5 m depth with all hard core and accessories
Terrazzo flooring
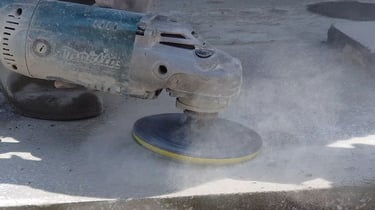
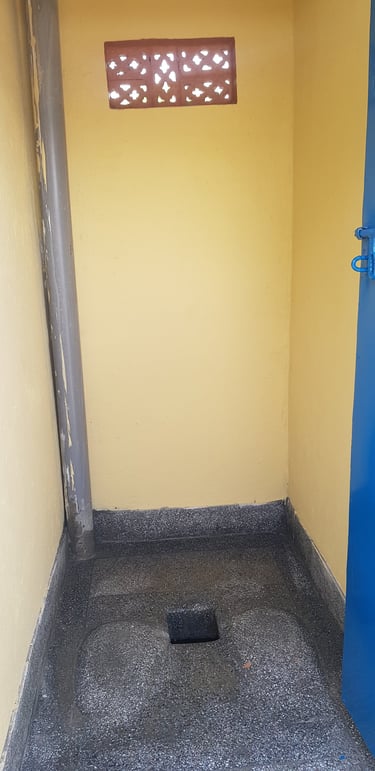
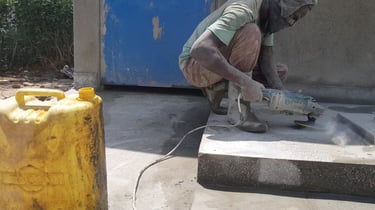
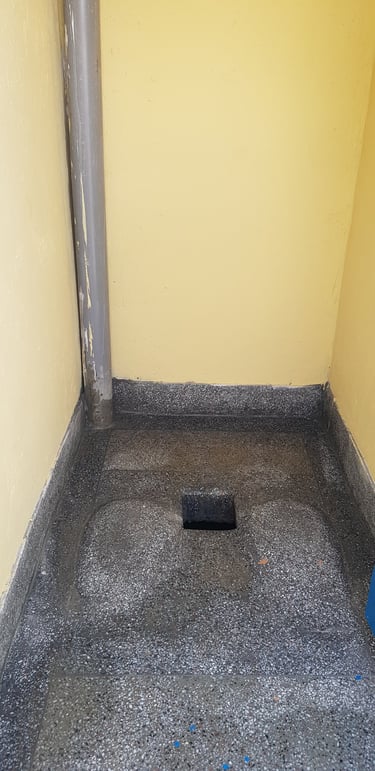
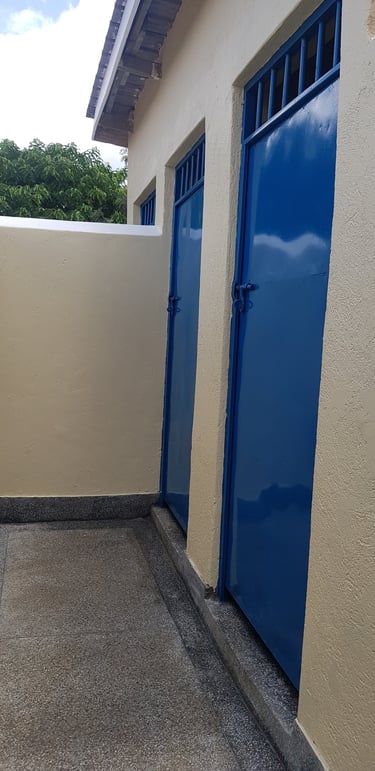
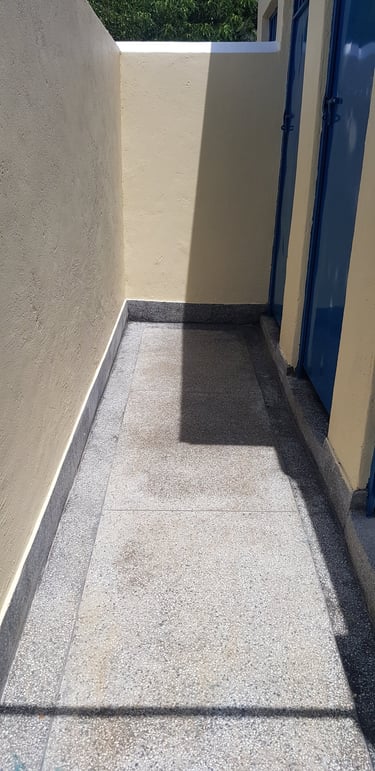


To ensure longevity of the pit latrine, consider casting in-situ terrazzo flooring for the entire floor. The advantage of using a terrazzo floor is that it can stay for so long without getting damaged. When doing grinding for a pit latrine, you need to stop at pad 50 (those who do terrazzo flooring will understand this). Exceeding pad 50 will cause the floor to be too sliding, which will hinder the safety of users who wash the floor and apply polish to the entire floor.
Also include a 150mm high terrazzo skirting.
Painting
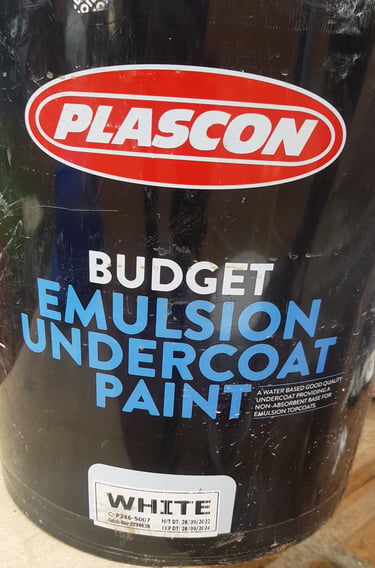

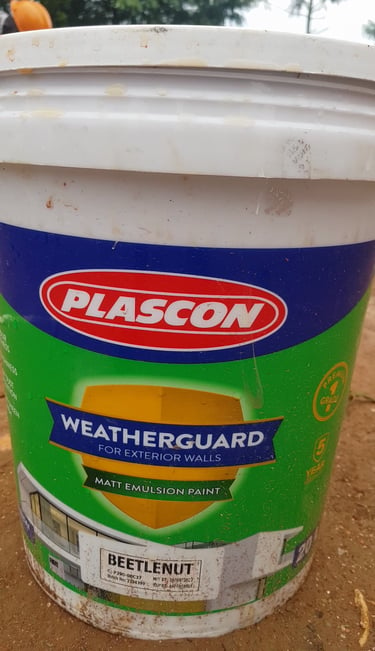



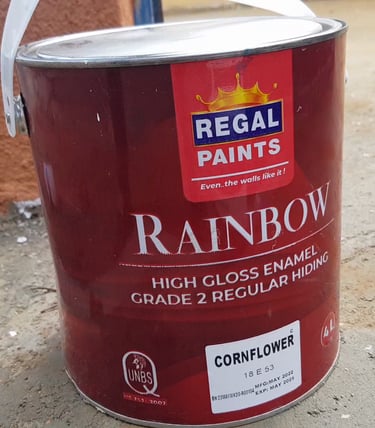

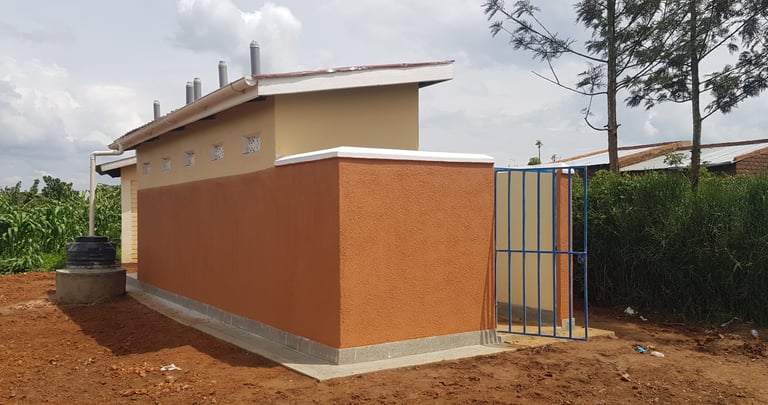
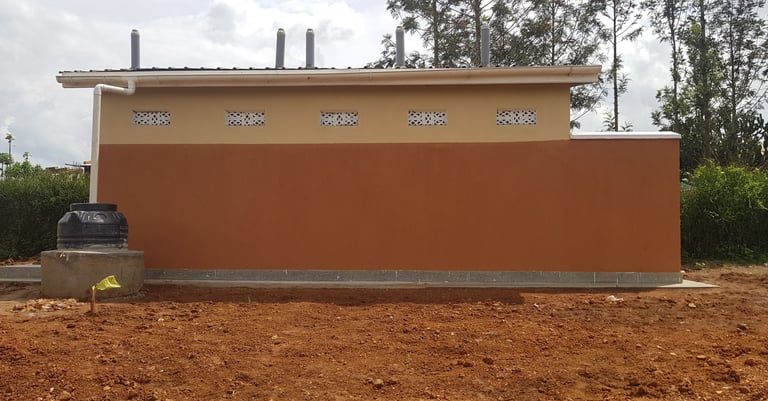
We use 4 different types of paint, as shown in the pictures above.
1. Undercoat: The first coat of paint on the wall surface
2. Weather guard. For exterior wall surfaces
3. Silk Vinyl. For interior wall surfaces
4. Gloss paint: For doors and other metallic surfaces
Prepare and apply two undercoats and three finishing coats of silk vinyl emulsion paint for all internal wall surfaces and weather guard emulsion paint for all external wall surfaces.
The choice of colours will depend on the preference of the client.
Also prepare and apply gloss paint to all doors or metallic grills.
The difference between gloss paint and emulsion paint is that emulsion paints are water-based paints, meaning you have to mix them with water, whereas
Gloss paints are oil-based paints, meaning they are fixed with paraffin kerosene or petrol.
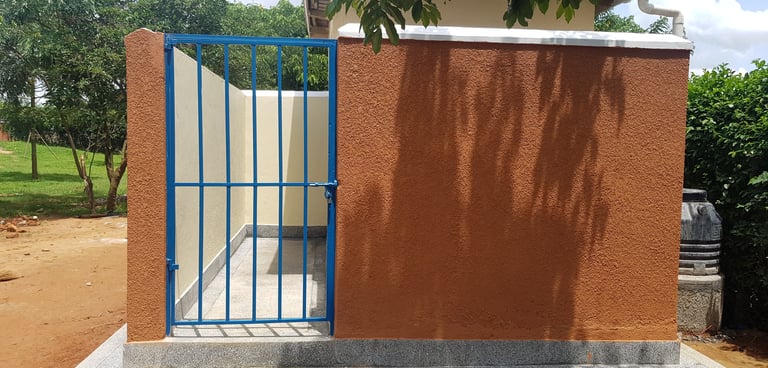

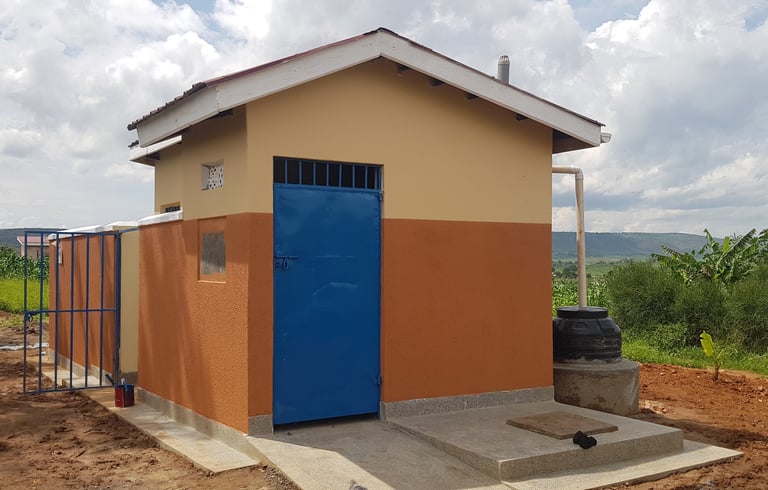



Mechanical Installations
Fix the gutter and also provide a 250-litre water tank with tap.
Supply and fix a gutter and a 100mm diameter PVC rainwater down pipe to direct water from the roof to a small tank of 250L fitted with a tap that is provided to enable users to wash their hands after using the pit latrine.
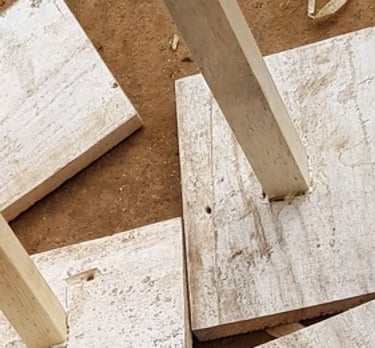
Provide wooden covers for drop holes complete with handles; you can simply make these by yourself on site



Design and paste with arrows and symbols of human artwork on the walls detailing gender segregation (male and female) in order to facilitate gender-sensitive use of the designated stances.
Finally, do the final cleaning around the site, provide padlocks for each metal grill and each door to prevent unauthorised access, and then hand over the site to the client.
Important Considerations
Throughout the construction process, certain precautions must be taken to ensure safety and functionality. Here are some critical points to keep in mind:
Ensure the door for the disabled is accessible and opens outward for ease of use.


Do not put holes in the curtain wall; it hinders the privacy of the users.
Treat all timber against termites before installation.
Maintain proper slopes in the flooring to facilitate drainage towards the drop hole.
Use appropriate manhole covers to prevent odours.
Install vent pipes at a sufficient height to avoid trapping gases.
Final Touches
Once the construction is complete, it’s essential to conduct final inspections. Ensure all surfaces are clean, and any necessary landscaping is done to maintain hygiene around the latrine. Provide adequate signage to indicate gender-specific usage and ensure privacy.
I created a video version on how you can build a ventilated, improved pit latrine from start to finish; click here to watch it
FAQs
How does a ventilated, improved pit latrine work?
A VIP toilet works by collecting human waste in an underground pit. Unlike modern septic tanks that soak away the sewage to the underground, the VIP pit latrine just collects the human waste, and when it’s almost to full capacity, a sewage truck comes and pumps out the sewage through an inspection chamber and takes it to a sewage treatment. A VIP drop-hole cover also has a vent pipe that allows air to flow through it, carrying a bad odour and also preventing flies from entering the latrine. It also has a provision for users to wash their hands after use.
How deep should the pit for the pit latrine be?
The pit should be approximately 3 metres, depending on the soil type and number of users. Personally, I use 3metres all the time.
How do I construct the superstructure for a VIP latrine?
The superstructure is built using bricks or concrete hollow blocks with a wall thickness of 150 mm, with a curtain wall and doors for privacy, with all the floors sloping as required to help out when clean, and also with a roof to protect it against unfavourable weather conditions.
What is the role of a vent pipe in a pit latrine?
The vent pipe helps to remove bad orders and also keeps flies out. It also allows aeration in the pit.
How can I maintain a VIP latrine?
Regular cleaning
Do regular cleaning.
Do landscaping around the pit latrine in a way that will take away any running water and not towards the pit latrine.
Can a pit latrine be built on any type of soil?
Yes, though in areas with high water tables (water-logged areas), you don’t need to excavate very deep. First lay hard core at the bottom, spread aggregates on top, do sand blinding, lay DPM below and around the pit, and build the walls. You have to mix water-proofing liquid or powder through the whole process in this case.
What are the benefits of using a VIP restroom?
VIP latrines have low maintenance costs and can be an ideal option for areas with low water supply. Unlike septic tanks that require water all the time to flush human waste, the only water required for pit latrines is the one used to wash hands after use and also cleaning it
They reduce disease spread by controlling flies and improve overall hygiene in communities.
How much does it cost to build a VIP latrine?
The cost of building a standard VIP latrine varies between 1000 USD and 10000 USD depending on the size or number of users, location, and the kind of floor required. For example, a terrazzo floor that is durable would increase the price, whereas a simple cement finish would be cheaper though it would wear out quickly, among other factors.
How do I know when to empty a VIP restroom?
You should empty or abandon using the pit latrine when it’s about 500mm from full to prevent facing issues with infections.
What are the common mistakes to avoid when building a pit latrine?
Avoid building pit latrines so close to water sources; they should be built at least 30 meters away from water sources.
Another common mistake is putting holes or gaps in the curtain wall. This hinders the privacy of users.
Another common mistake is positioning the squat pad poorly. Directing people poorly will automatically cause people to shit on the floor. Be sure to position the squat pads properly, ensuring that shit will perfectly drop into the drop hole. Be sure to practice those steps before placing them for other people; first try it out.
Roofing using untreated timber. After some time, termites will eat up the timber; that’s obvious. Be sure to treat the timber against termites by simply using Tanalith chemical for the safety of your roof.
Another common mistake is having a step at the entrance of the pit latrine for the disabled. This caused difficulty for the wheelchair from entering the pit latrine. Ensure that the rise of the ramp matches correctly with the finished floor.
Another common mistake is with landscaping. This is a funny one; after building a pit latrine, most people never mind about landscaping, and then after some time all the storm water comes towards the pit latrine. All the water goes directly to the brick wall underground. What will happen is that after some time, the walls will fall inside. I’ve seen this a dozen times. And that is why it is so important to do landscaping in a way that won’t allow running storm water from reaching the pit latrine.
Placing the PVC water tank far away from the roof. The PVC down pipe will break after heavy winds.
When backfilling, do it in layers while also compacting and pouring with water; if you fail to do so, the splash apron will develop cracks and fall off after a period of around 3 months or less.
Use approved sealants, for example, bitumen repair tape, or use a caulk gun and apply a silicone sealant at the areas where the vent pipe protrudes the roof. Personally, I use the latter all the time.
Failure to seal this part will cause severe leaking. The common mistake people make is filling this part with sand and cement screed. After some time, the iron sheet will expand or, on other days, contract, and eventually the sand will fall off. Leaking will be automatic. click here to see the correct way