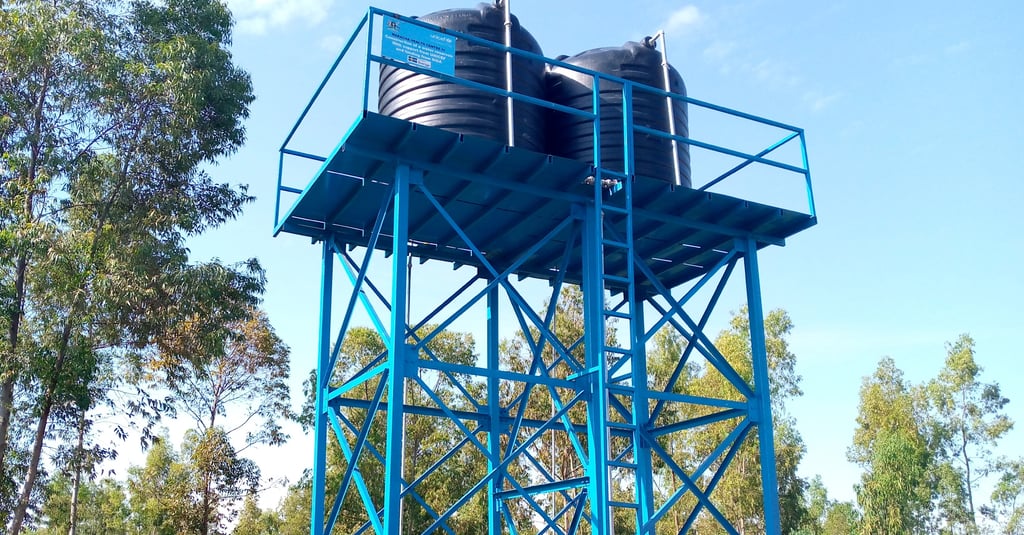
How to build a steel stand tank tower
In this post, you are going to learn how to build stands for water tanks construction for metal water tank stand
STANDS FOR WATER TANKS
How to build a steel stand tank tower
Table of Contents
Core Concept or Idea
Understanding the Importance of a Strong Base
Step-by-Step Process to Build a Steel Stand Tank Tower
3.1 Materials and Tools Needed
3.2 Step 1: Site Preparation
3.3 Step 2: Setting Out
3.4 Step 3: Excavation
3.5 Step 4: Concrete Blinding
3.6 Step 5: Steel Reinforcements
3.7 Step 6: Formwork for the Bases
3.8 Step 7: Casting Concrete for the Bases
3.9 Step 8: Casting Concrete for the Ground Beam
3.10 Step 9: Curing and Hardening
3.11 Step 10: External Rendering
3.12 Step 11: Erecting the Steel Structure
3.13 Where Do We Use a Steel Stand Tank Tower?
3.14 Step 12: Plumbing
3.15 Step 13: Completion
Safety Considerations
Conclusion
FAQs
Core Concept or Idea
Building a strong steel stand tower for water tanks is essential for ensuring the safety and efficiency of water storage. As a civil engineer with years of experience in water projects and generally WASH projects, I prepared an easy step-by-step guide on how to build a strong steel stand tower for a water tank.
I have worked on over 50 projects, so this guide will lead you through each step of the construction process, providing detailed instructions and tips to help you create a structure capable of supporting significant weight. Whether you’re constructing a single tank or multiple tanks, understanding the construction techniques and standards will ensure your project’s success.
The importance of a strong base for water tanks stands
A strong water tank base is crucial due to the heavy weight of water. Water weighs approximately 1,000 kilograms per cubic meter, so a tank holding 20,000 litres will weigh around 20,000 kilograms when full.
This weight requires a solid foundation and a well-designed stand. In this post, we will discuss the importance of a strong base and how it contributes to the overall stability and safety of the water tank.
Weight Distribution: A well-constructed base evenly distributes the weight of the tank, preventing structural failure.
Soil Stability: Proper excavation and soil treatment help create a stable foundation.
Safety: A strong stand reduces accident risks, ensuring safe water storage.
Step-by-Step Guide to Building a Steel Water Tank Stand
Below is a step-by-step guide to constructing a steel tank stand that is 5 meters high and designed to hold 20,000 litres (20 cubic meters) of water. You can choose to use one 20,000-litre tank, two 10,000-litre tanks, or four 5,000-litre tanks, as long as the stand supports a total of 20,000 litres.
Process of building a steel stand tank tower
Materials and Tools Needed
Materials:
Sand, aggregates, and cement for concrete
Steel reinforcement bars
Anti-termite treatment solution
Tools:
Concrete mixer (or use manual mixing if preferred)
Spirit level, wheelbarrow, hoes, spades, and pickaxes (for excavation)
Water level, tape measure
Welding machine (available for hire)
Safety gear (gloves, goggles, and hard hats)
Step 1: Site preparation
Clear the site and remove the topsoil not exceeding a depth of 250 millimetres. A clean, level site will make the construction process more precise.

Step 2: Foundation Layout
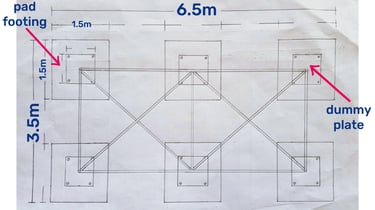
Next, set out the foundation for the tower. Follow the detailed foundation plan. We are considering an external length of 6.5 meters and a width of 3.5 meters for each pad or footing to measure 1.5 meters on all sides. Add working space for each base. Ensure that you maintain a distance of at least 1.5 meters away from property boundaries and any large structures. Also ensure accuracy with diagonals when setting out the foundation.
Step 3: Excavation


Excavate for the bases to a depth not exceeding 1.5 meters, depending on soil stability. It’s crucial to apply anti-termite treatment to prevent damage from pests. Skipping this step can lead to significant issues later in the future, so be sure to apply anti-termite treatment to the sides and bottom of the pit. Dispose of the excavated soil away from the site.
Step 4: Hard Core and Sand Blinding (Optional for Waterlogged Sites)
For waterlogged areas, first lay a hard core at the bottom of the bases. The hard core depth should not exceed 200 mm. After laying a hard core, do sand blinding.
Step 4: Concrete Blinding
When working in hard soils after excavation, you don’t need to lay a hard core at the bottom. Simply cast a 75-millimetre-thick concrete blinding in the bases using grade 15 concrete. The mix ratio should be 1 part cement, 3 parts sand, and 6 parts aggregate. This layer acts as a foundation for the steel reinforcements.
Step 5: Steel Reinforcement
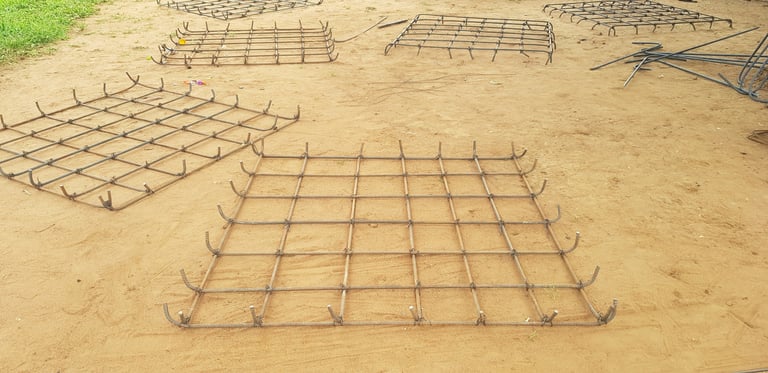

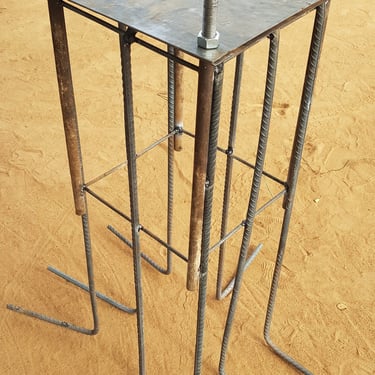
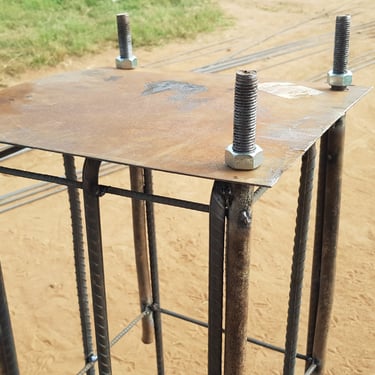
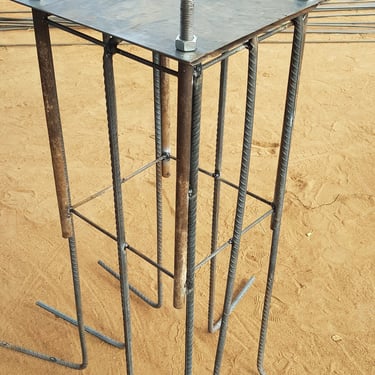
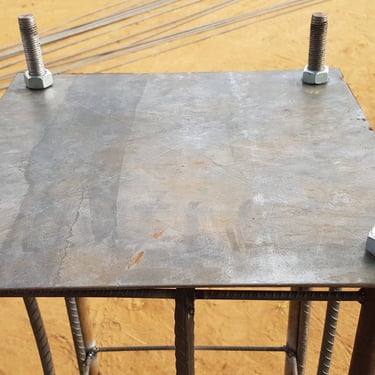

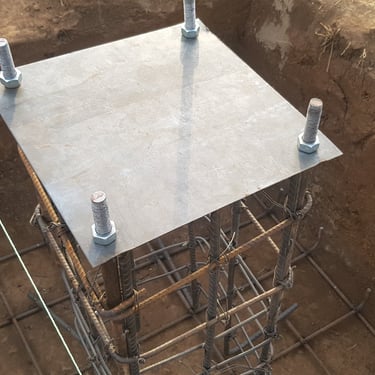
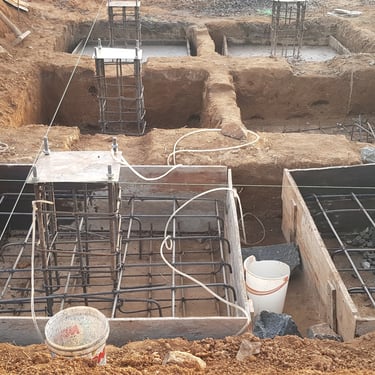
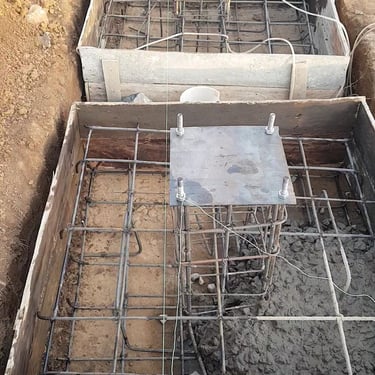
Cut, bend, and tie the steel reinforcements for the pads and stud columns. A stud column is a short column that is connected to the base or footing. When doing steel reinforcements at this stage, you have to follow the guidelines below:
Use steel bars of Y12 for the base or footing and Y16 for stud columns.
Use spacing of 150mm centre to centre for all steel reinforcements.
Use spacer blocks of 50 millimetres to maintain appropriate concrete cover for the steel.
The bases must have both top bars and bottom bars.
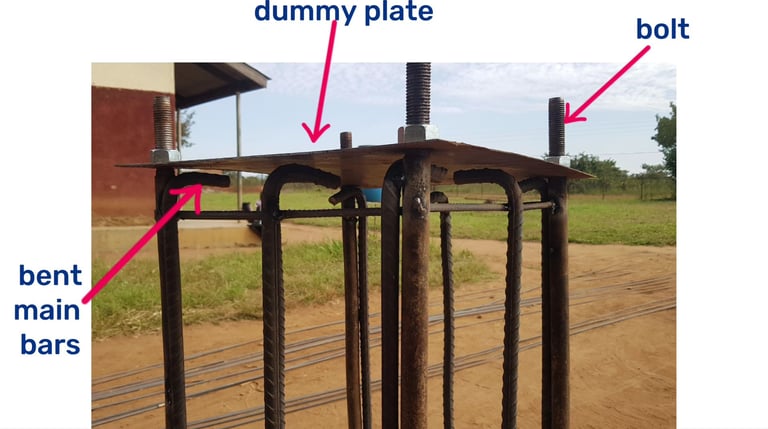
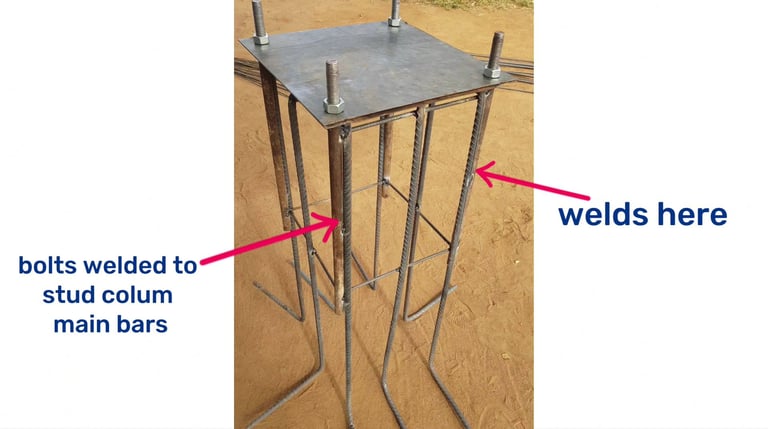
Prepare stud columns to be able to support the dummy plates.
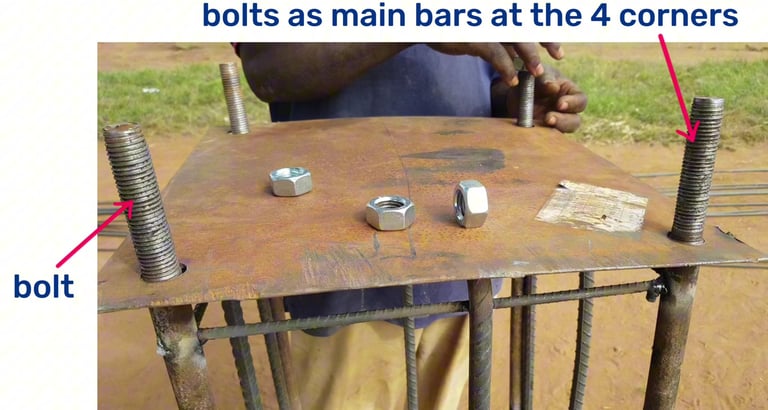
When choosing where to put the bolts
a).You can either weld the shanks of the bolt on to the Y16 stud columns. The shank refers to the smooth unthreaded part of the bolt
b) Go to any welding workshop and make the Y16 steel bars acting as the stud columns to have threads on top such that the plate will be fixed on top easily with the nuts
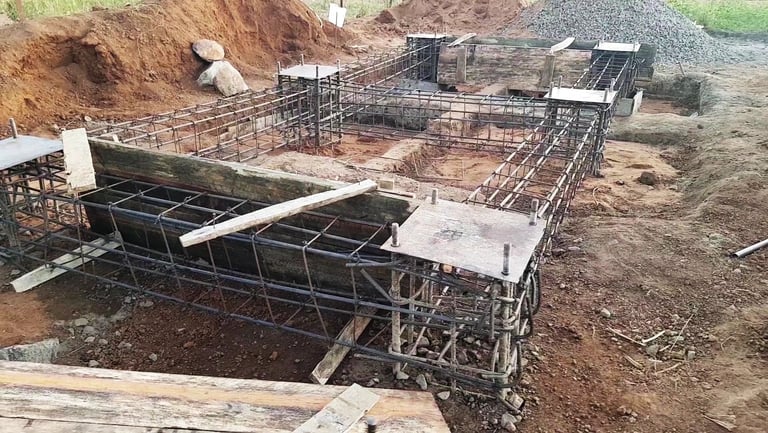
Use a level to ensure that each dummy plate is on level with its four corners or sides, and also ensure that all dummy plates are on the same level.
Step 6: Formwork Installation
Install formwork around the sides of the bases to contain the concrete during pouring. This will maintain the shape and dimensions of the structure.
Step 7: Casting Concrete for Bases
Cast concrete for all the bases, ensuring a thickness of 600 millimetres with a mix ratio of 1:1.5:3. That is 1 part of cement, 1 and a half sand, and 3 parts of aggregates. Use levelling tools to ensure all bases are uniformly level.
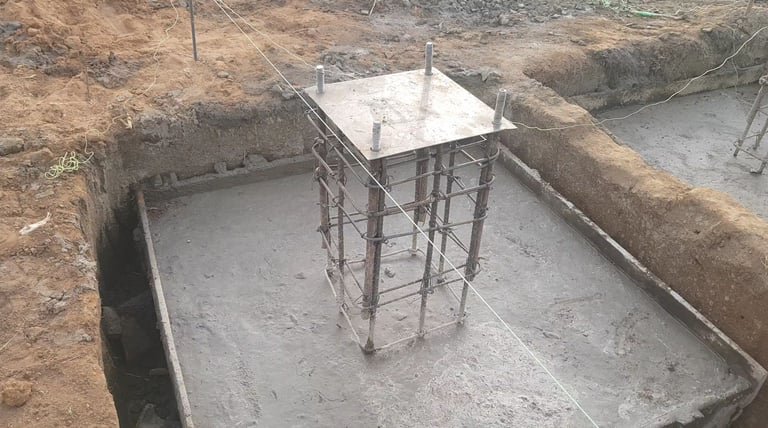
Ensure that all dummy plates are on the same level and in the correct position at the time of casting concrete so that the metallic stand that we shall fabricate at a later stage can fit perfectly.
When casting concrete, put the dummy plates on the stud columns so as to help to keep the steel bars for the stud columns in position until the concrete is fully dry. When you remove those dummy plates, the steel bars will get out of position.
Step 8: Ground Beam Construction
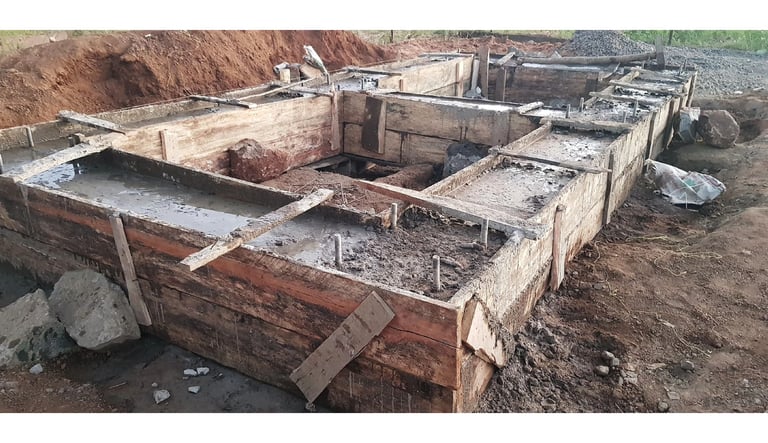
The pictures above show steel reinforcement for the ground beam, followed by casting concrete and lastly plastering the ground beam. The beam should be of 500 millimetres depth, using the same concrete mix as for the base, which is mix ratio 1:1.5:3 (1 part of cement, 1.5 sand, and 3 parts of aggregates). This beam provides additional support to the structure.
De-shuttering has to be done after at least 14 days.
Pour a small layer of sand on top of the beam before de-shuttering when doing curing. The sand helps to maintain adequate moisture and temperature to allow concrete to achieve its intended strength.
Cure the concrete for at least 14 days, sprinkling water three times daily. Skipping this step risks cracking when the tanks are added, as the concrete won’t be strong enough to support the water's weight.
At his point, you can either choose between the two options.
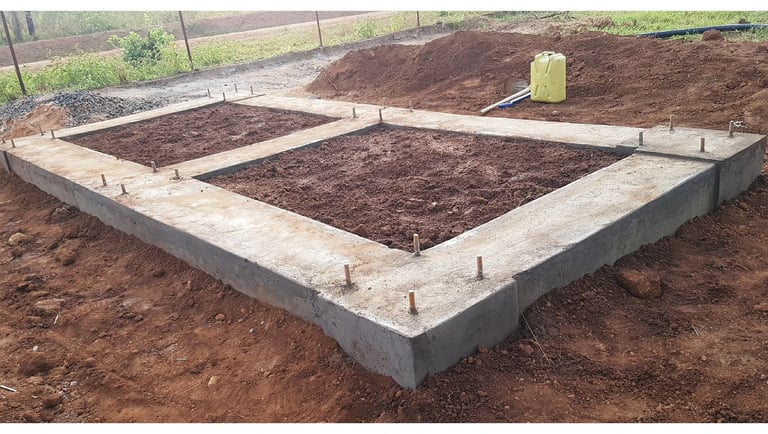
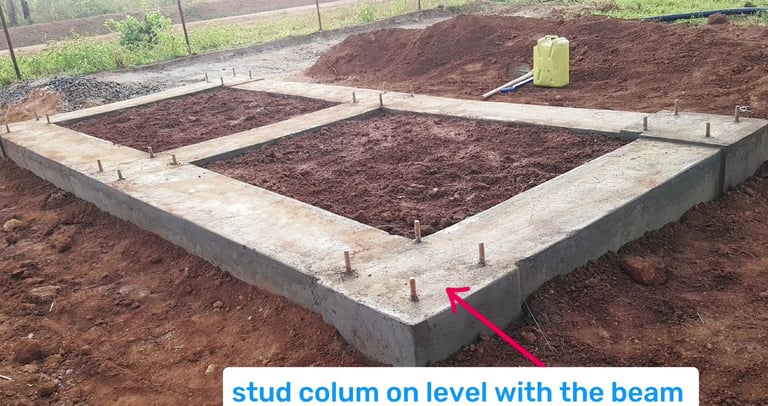
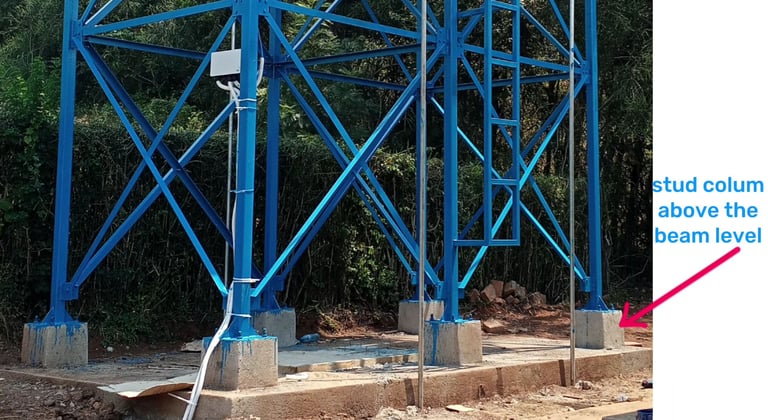
a) the top level of the ground beam to be on the same level as the stud columns, with only the bolt threads above the beam as shown in the picture below









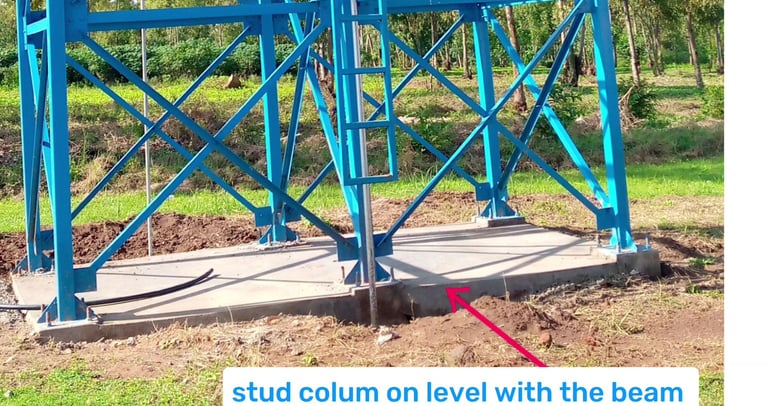

b) You can also opt for a slightly higher stud columns as shown in the picture below

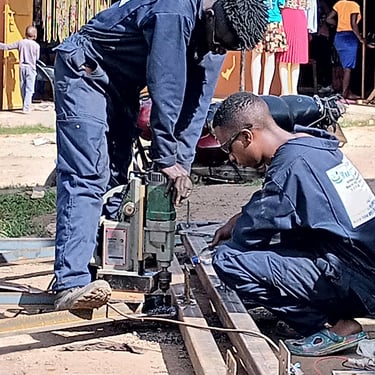
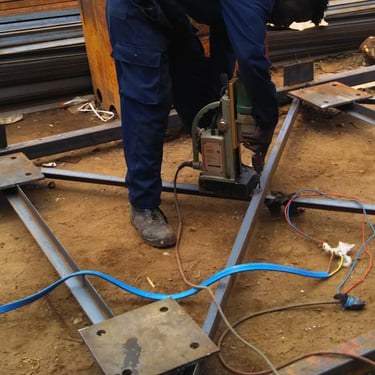
Step 10: Fabrication
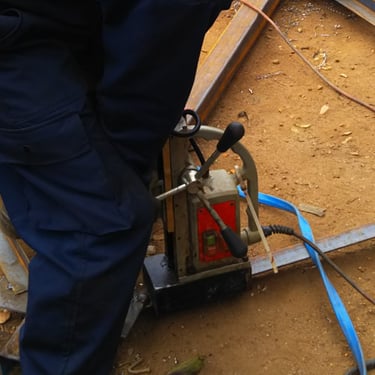
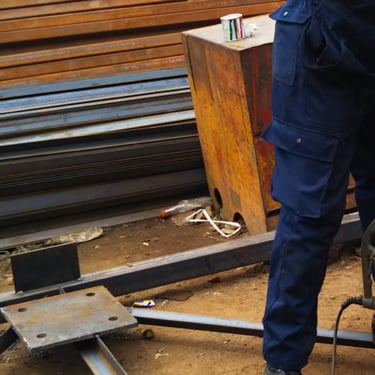
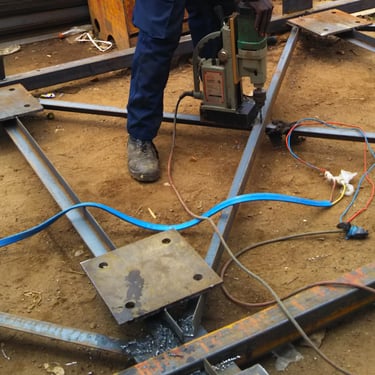
Step 10: Erecting the structure
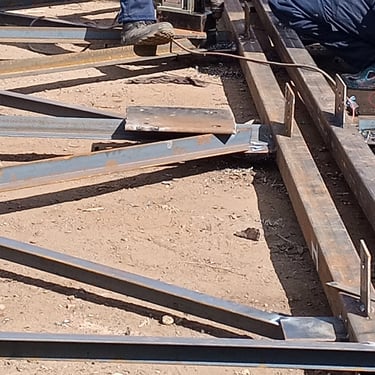
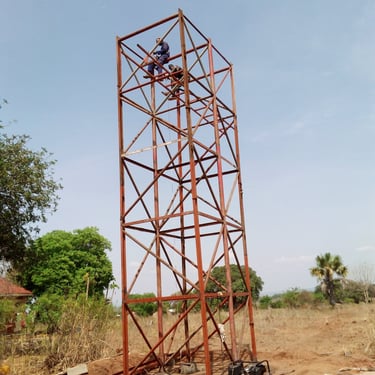
This step involves erecting the steel sections. Cut and trim the steel tower frame columns, braces, ties, struts, and gussets.
Begin by joining the columns and adding bracing for stability.
The next step is adding the primary beams, and then the secondary beams on top. Be sure to tighten the steel tower frame with bolts and weld.
3. Also fix the top part to receive the tanks and provide guard rails. The bottom has to be perforated and with braces.
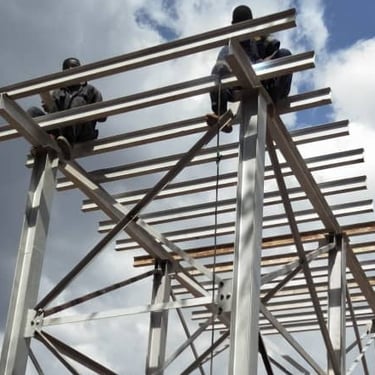
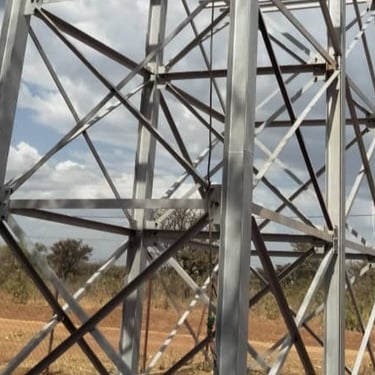
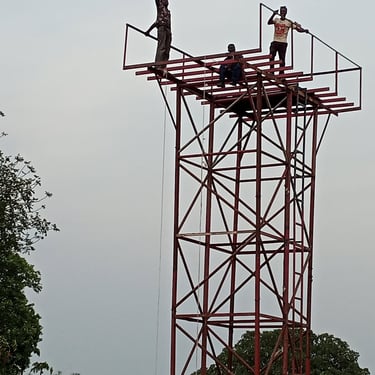
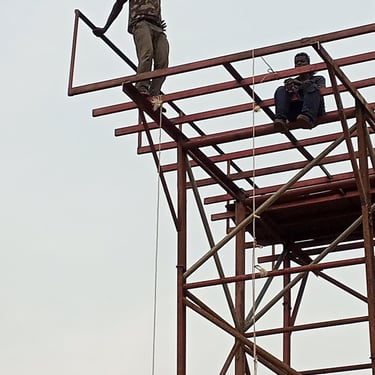
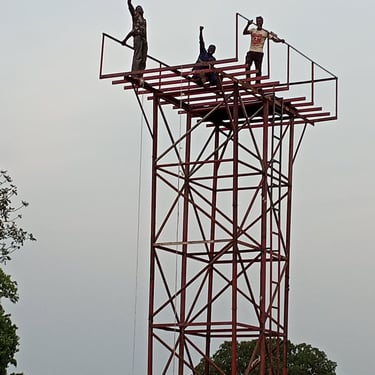
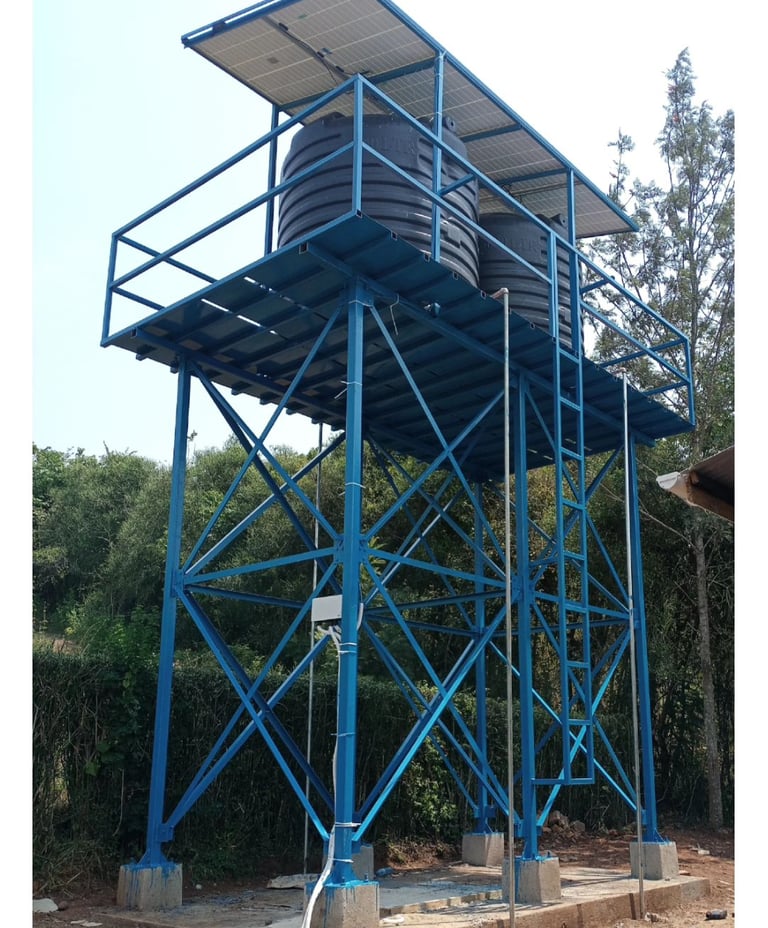
Steel stand tank tower with solar rack
When you are considering a steel stand having a solar rack, you add a solar rack at this stage when welding. This solar rack is usually added to the steel tower when we are using solar energy to pump water from underground in areas where there is no hydropower or unstable hydropower to pump underground water to these reservoir tanks.
Where do we use a steel stand tank tower with a solar rack on top?
It's commonly used in crop gardens, where solar panels pump water from underground to reservoir tanks, which then supply irrigation systems.
It is also used on animal farms where water is pumped from underground by solar to the reservoir tanks, then from the reservoir tanks to the troughs, where animals can get clean drinking water.
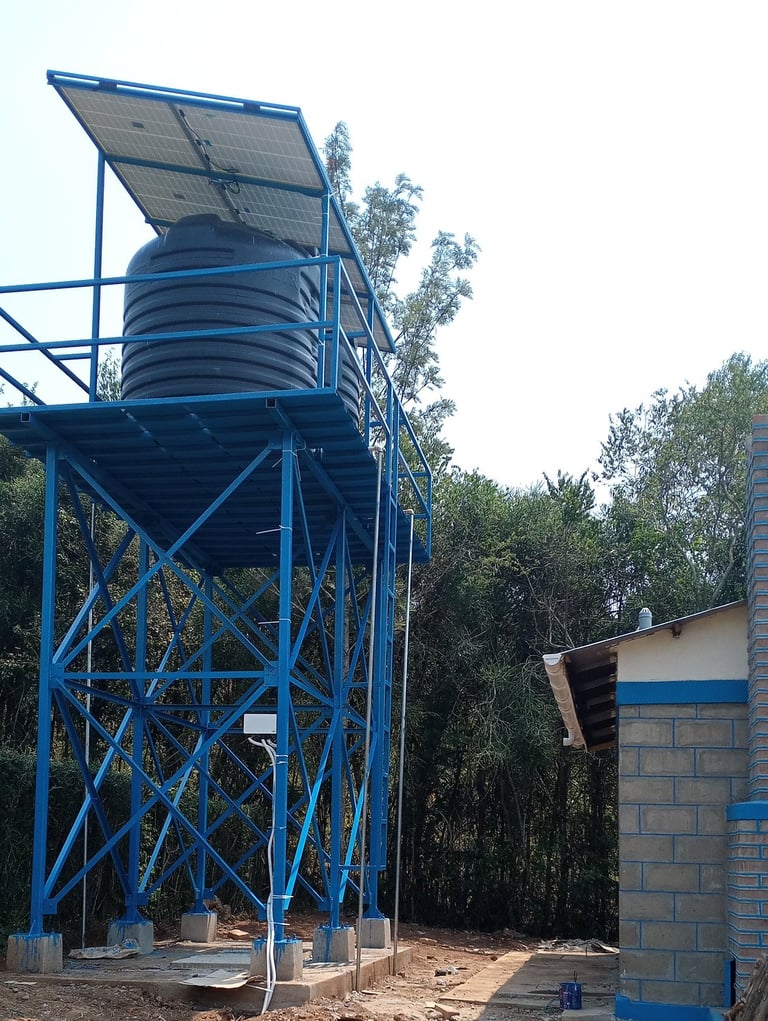

The picture above shows how you can also build a toilet for a school, church, mosque or hospital. The toilet has a steel stand tank tower with solar panels on top to pump the water to reservoir tanks. The water can then be used by the users after using the toilet and also cleaning the toilet
Ensure all frame connections are secure and that the structure is level. Finally, place the water tank on the completed stand.
Paint the steel tower with an undercoat primer and the final coat of your favourite colour. For example, aluminium silver paint. My favourite one is blue.
Place the plastic or metallic tanks and do the necessary plumbing connections for the inlet, outlet, and overflow pipes, and wash.
Construct manholes, where necessary; install control valves; and also install water meters.
Do overall finishes, land scaping, cleaning up the site, and hand over the completed steel stand tank tower to the client.
I also created a video on how to build a steel stand tank tower; click here to watch it


Safety Considerations
Safety should always be a priority during construction. Here are some essential safety tips:
Wear appropriate safety gear, including helmets, gloves, and protective eyewear.
Ensure all tools are in good working condition before use.
Follow safety protocols when working with heavy materials and machinery.
Keep the work area clean and organised to prevent accidents.
Conclusion
Building a steel stand tower for a water tank can be challenging, but with careful planning and following the above steps, you can create a durable, safe structure to support your water storage needs.
Frequently Asked Questions
What are steel water tank towers used for?
Water tank stands are primarily used to elevate water storage tanks or reservoir tanks, allowing for gravity-fed water supply. This creates reliable water supply for homes, farms, or industrial use.
What materials are used for building a water tank stand?
The best material for a water tank stand is galvanised steel or mild steel, which provides sufficient structural strength required to support the large water storage tanks. Galvanised steel is preferred for its rust resistance, ensuring a longer lifespan due to the fact that most of these steel stand tank towers are built in outdoor spaces, making it a perfect material to be used.
What are the benefits of using a steel water tank stand over a concrete water tank stand?
Steel vs. concrete water tank stand and benefits of steel water tanks
Durability Steel structures are strong and reliable, able to support tanks with capacities up to 20,000 litres or more. Unlike concrete, which starts cracking when slightly overloaded
Corrosion Resistance. Galvanised steel resists rust since it's mostly used in outdoor spaces.
Ease of Construction: Unlike concrete, which needs to do formwork fast to do steel reinforcements, cast concrete and finishing steel stands are quicker to assemble, saving both time and labour costs.
How high should a steel water tank stand be?
The height of the water tank stand directly influences water pressure. For example, the commonest height that we normally use is 5 m. Generally, for every 3 meters or 10 feet of height, you get about 29647 pascals of pressure. Taller structures provide higher pressure, making it ideal for water systems that need to supply multiple floors.
What are common water tank capacities supported by steel tank towers?
Steel tank towers can support a wide range of capacities, from 5,000 litres to over 50,000 litres or even above as water tank capacity for steel stands. The tower should be custom-designed following the structural engineers drawings and details to safely handle the weight of the full water tank, especially during extreme weather conditions like wind or heavy rain.
How much does it cost to build a steel water tank tower?
The cost of constructing a steel water tank stand or price depends on the height, design, and tank capacity. On average, starting from $3000 depending on your local prices for smaller structures, it can go up to several thousand dollars for larger industrial towers. For example, for constructing a steel stand tower to carry 20,000 litres in a hard-to-reach area on an outdoor field, including a solar rack, that usually ranges between $5,000 and $10,000 USD depending on your location, size, and also the conditions on site.
What is the difference between steel and concrete water tank stands?
Steel vs. concrete tank stand
Steel stands are generally quicker to build, more flexible, and easier to maintain than concrete tank stands.
However, concrete is more durable in waterlogged areas or areas prone to corrosion and flooding. The choice depends on the environment budget, the environmental conditions, and the type of tank being installed.
In simple terms, we can use a steel stand tank tower in generally dry areas and then use a concrete tank stand in very cold areas or areas that are prone to flooding.
What safety precautions should be taken with steel water tank towers?
To ensure the safety and longevity of the steel water tank tower
Water tank stand safety is mostly with steel tank tower foundation. Ensure a solid foundation that can support the combined weight of the water tank and the tower.
Regularly inspect the structure for signs of rust, especially around joints where the gusest plates connect to the bracings.
Design the tower to withstand local wind loads and any potential seismic activity. A structural engineer drawing must be followed when building a tank-stand tower.
How to maintain a steel water tank stand?
Steel water tank stand maintenance involves regular inspections to check for rust or structural weakening. Apply anti-corrosion treatments like painting or galvanisation to prevent deterioration, especially in high-humidity or coastal areas.
10. Can solar panels be installed on a steel water tank stand?
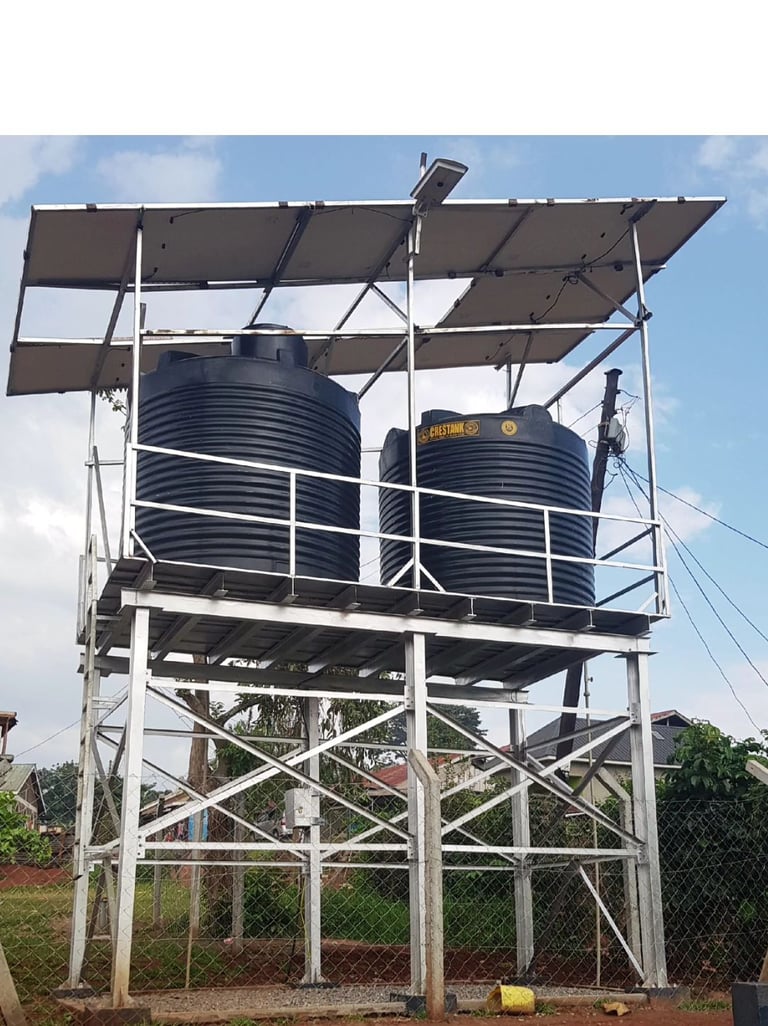

Yes, many modern steel water tank stands are designed with a roof that can accommodate solar panels. These panels can power water pumps or provide energy for other utilities, making the system both eco-friendly and cost-efficient.
What are the most common problems with steel water tank towers?
The most frequent issues with steel stands are rust, especially if not galvanised, and structural weakness over time due to poor maintenance. Regular inspections, painting, and reinforcement of joints can prevent long-term damage.
Why choose a steel water tank tower over wood or plastic? steel water tank stand vs. wood
Steel is far more durable and resilient compared to wood or plastic, which can degrade or get damaged over time. Steel also offers superior load-bearing capacity, making it the best option for large-capacity water tanks.
If you are looking to elevate water for home use with an alternative option, you can also check out the reinforced RCC tank stand. Click here to read the full article
